So I’ve made a simple site which uses Firebase for data storage. It is a powerful platform because it allows you to save data and at the same time output the data realtime on the site. You can also host your site using the Firebase hosting service. It also offers User Authentication service which enables user to login via email or most of the social media society uses nowadays. You can use firebase for free or you can also apply for a plan which gives you larger storage, more connections, custom domains and etc. You can sign up here.
In this example I only used Javascript in integrating Firebase on the site. For me this is the simplest way you can set up Firebase to your site. If you’re only making a small web app using only JS will be sufficient and less more complex.
Registering and creating your first Firebase app

To start, you must register an account first and create your first Firebase app on your Firebase dashboard. Click “Manage App” button to access the firebase app you’ve just created.
Managing your app
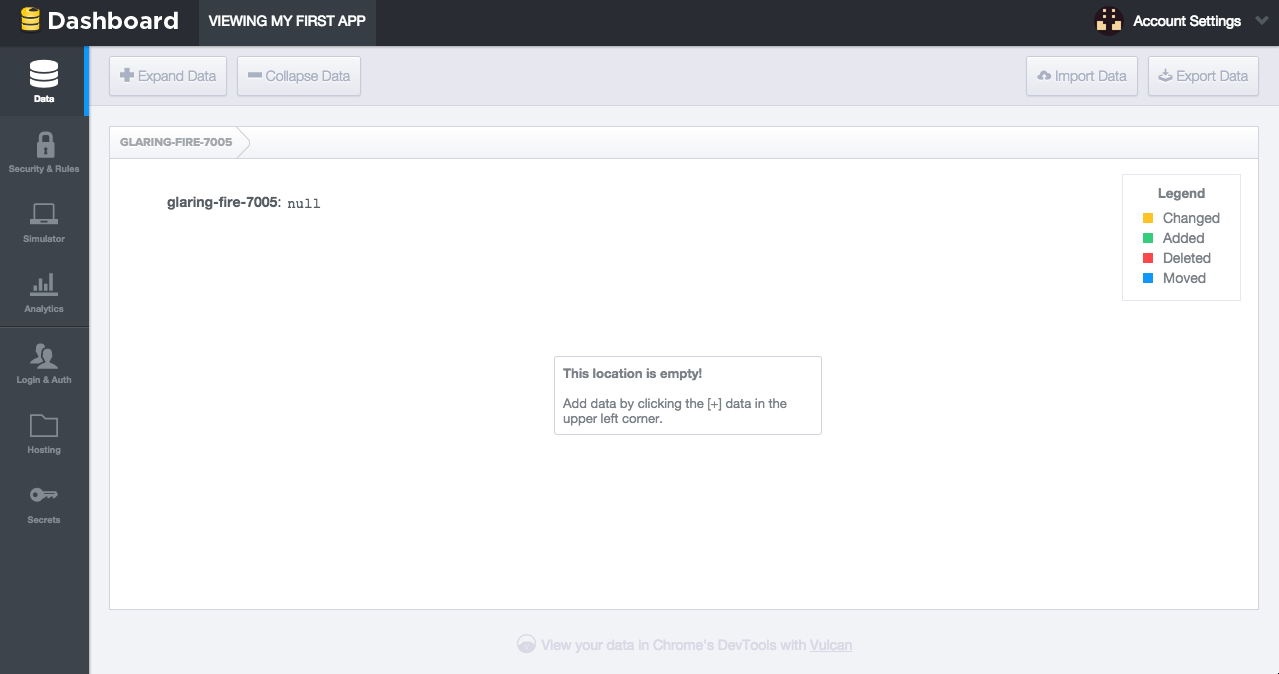
Once you’ve clicked the “Manage App” button, you will be redirected on a new dashboard. As you can see on the left side there’s a menu bar, Data, Security and Rules, Simulator, Analytics, Login & Auth, Hosting and Secrets. I’m gonna explain each briefly.
- Data - this is where you will see the stored data. You can import data using JSON format and you can also export existing data from your firebase and it will generate a JSON file. You can also add and delete data to the firebase via this dashboard.
- Security and Rules - you can set rules here for the users. The default rules implemented are the read and write set to true so that users can read and write data on the firebase app we made.
- Simulator - you can try the authentication and read & write functionality of your firebase app. This is a useful feature when you’re setting up the login & authentication rules and rules of the firebase app you made.
- Analytics - you can see here the total data stored, bandwidth for the last 24 hours and last 30 day and concurrent users. Updates ever 15-20 mins.
- Login & Auth - you can set up the login & authentication of your site here. You can set login via email, facebook, twitter, google +, github or you can create your custom authentication.
- Hosting - by default when you’re site is still not hosted via firebase this contains steps on setting up and deploying your site. Once deployed, this will be the directory for your static files(HTML,CSS,JS,etc.)
- Secrets - used to generate tokens when crreating a custom authentication for your site. This will store all the tokens made.
Making the template of my simple site.
Code
<title>Firebase Trial</title>
<script src='https://cdn.firebase.com/js/client/2.2.1/firebase.js'></script>
<script src="//code.jquery.com/jquery-1.11.3.min.js"></script>
<script type="text/javascript" src="main.js"></script>

<style type="text/css">
#submit{
    padding: 20px;
    background-color: gray;
    width: 50px;
    border-radius: 10px;
    margin-top: 10px;
    cursor: pointer;
}

#records{
    margin-top: 20px;
    width: 300px;
    margin:0 auto;
}

tr{
    text-align: center;
}

</style>
<input type="text" class="inputs" id="name" placeholder="name" required>
<br />
<input type="text" class="inputs" id="address" placeholder="address" required>
<br />
<input type="text" class="inputs" id="nickname" placeholder="nickname" required>
<div id="submit">Submit</div>

<table border="1" id="records">
    <tr>
        <th>Name</th>
        <th>Address</th>
        <th>Nickname</th>
    </tr>
</table>
Output:
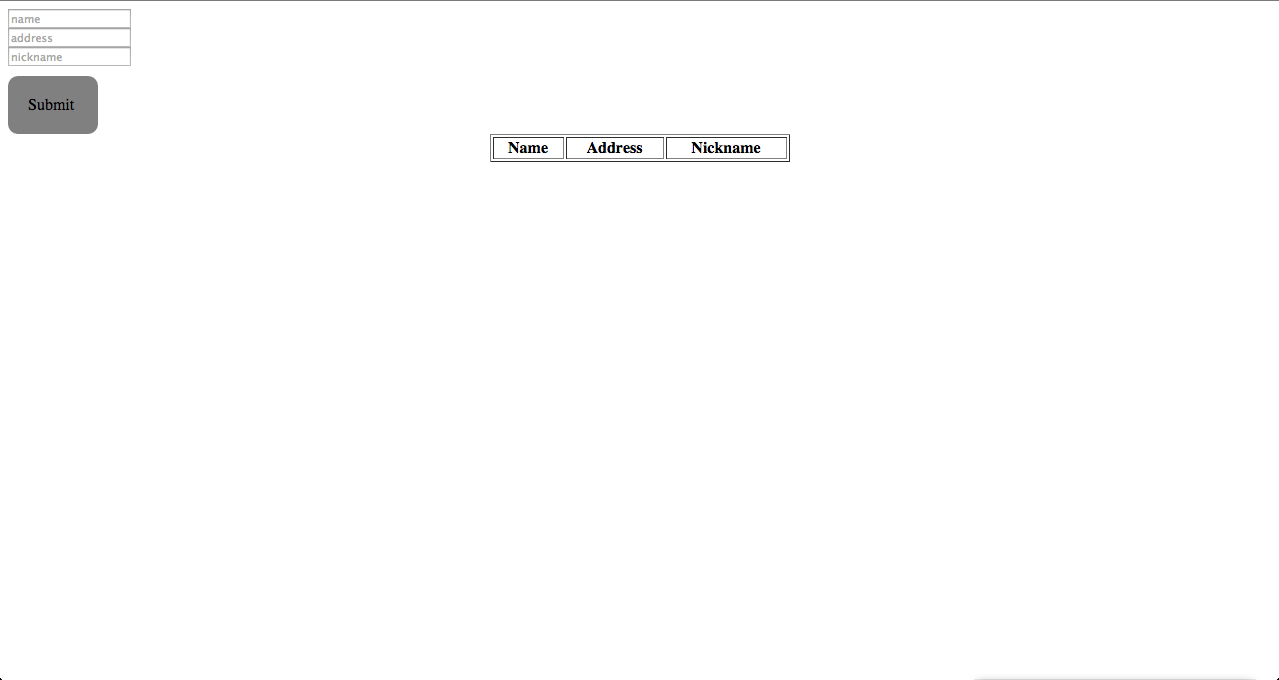
This is the code of my template, the first code block is for the head part of my code. The most important script file to be included is the firebase.js because without it we won’t be able to integrate firebase to the site. jQuery is not compuslary since we can just use Javascript in integrating it.
The second codeblock is for the body of my template, it contains three text boxes that will get the name,address and nickname of a user and a submit button to save the inputs of the user. I’ve also included a table but there’s no data yet just headers because that’s where I’ll populate the data later. As you can see on the output part, that’s what the template I made looks like when there’s no data.
Populating the table
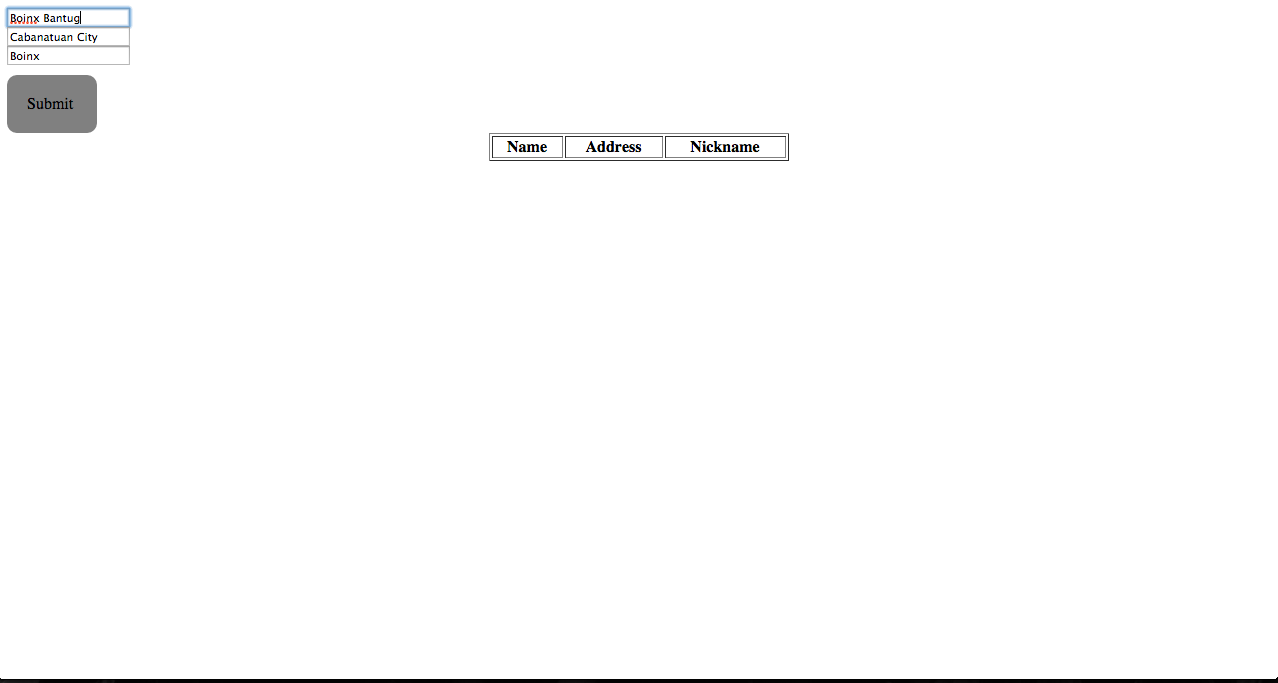
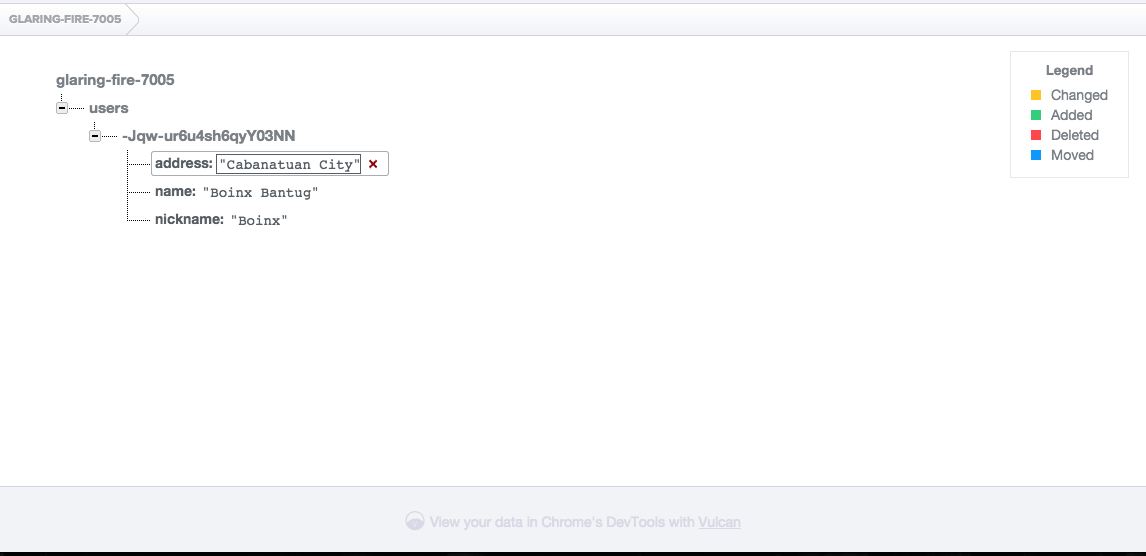
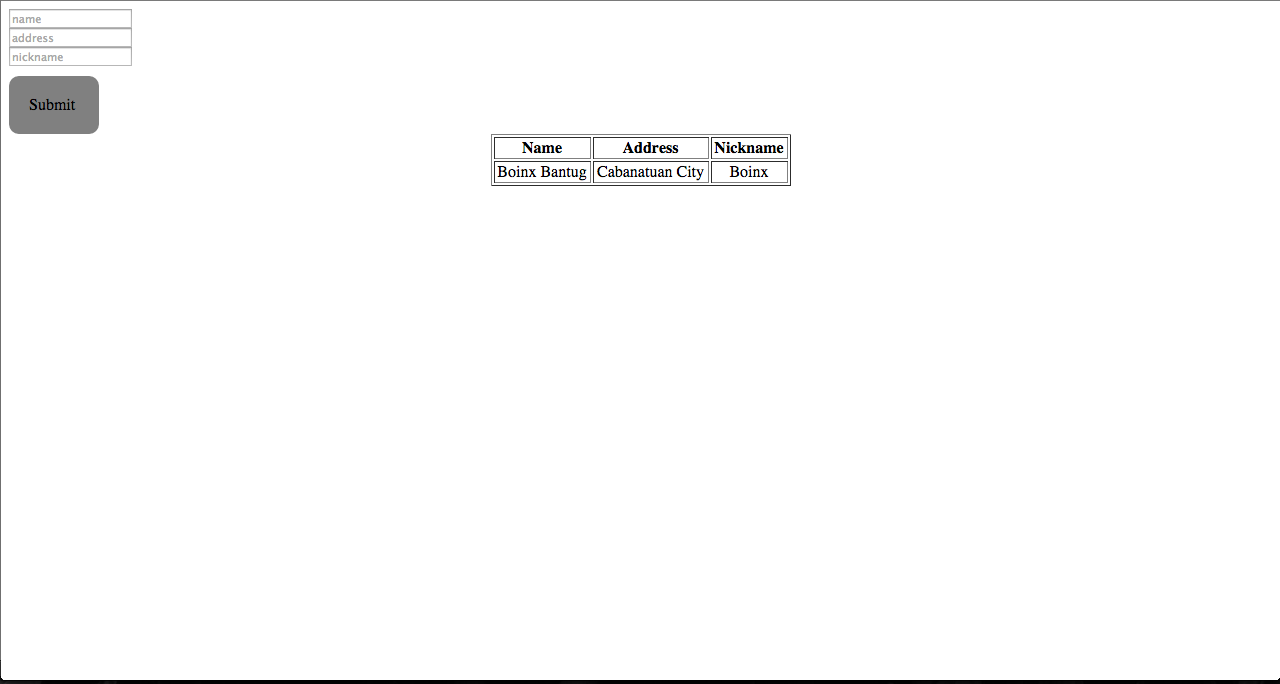
Once I clicked on “Submit” button the data will instantly be stored in firebase and firebase will now sync it on the site real time with no refresh needed on the site. As you can see on the 2nd pic, it created a child under glaring firebase named “users” and under it is the data I’ve encoded.
JS Code
$(document).ready(function(){

//Integrating Firebase
var fireBase = new Firebase("https://glaring-fire-7005.firebaseio.com");
var fireBaseusers = fireBase.child("users");

//Saving data
$('#submit').click(function(){

    var name = $('#name').val();
    var address = $('#address').val();
    var nickname = $('#nickname').val();

    if(name == '' || address == '' || nickname == ''){
        alert('Please fill up everything');
        return;
    }

    fireBaseusers.push({
        name:name,
        address:address,
        nickname:nickname
    });

    $('.inputs').val('');
});

//For real time changes.
fireBaseusers.on("child_added", function(data) {
    var records = data.val();
    displayRecords(records.name,records.address,records.nickname);
});

function displayRecords(name,address,nickname){
    $('#records').append('<tr>' + '<td>' + name + '</td>' + '<td>' + address + '</td>' + '<td>' + nickname + '</td>' +'</tr>');
}
});
Code explanation
var fireBase = new Firebase("https://glaring-fire-7005.firebaseio.com");
First you should declare your Firebase by putting it on a variable so that you can use this variable anytime when making changes on your firebase app. It’s up to you what variable name you’ll use. For this sample site I’ve used “fireBase”.
var fireBaseusers = fireBase.child("users");
Here I created a child on my Firebase named “users”. This is the reason why on the 2nd pic on the Populating the table part the user I’ve entered is under “users”. I did this just to make the data organized. Notice that I used the “fireBase” variable which is my firebase then the .child function tells JS that I’m assigning this variable to a child named “users” under my Firebase.
//Saving data
$('#submit').click(function(){

    var name = $('#name').val();
    var address = $('#address').val();
    var nickname = $('#nickname').val();

    if(name == '' || address == '' || nickname == ''){
        alert('Please fill up everything');
        return;
    }

    fireBaseusers.push({
        name:name,
        address:address,
        nickname:nickname
    });

    $('.inputs').val('');
});
I’ve created a “click” function for my submit button and created variables in which the data I input on the textboxes will be stored. The “.push” function is the on who initiate the pushing of data to the Firebase. It’s telling to push it on “fireBaseusers” which is the variable I’ve made earlier that’s referencing to the child “users” under my Firebase. Inside that function you should put the data that will be pushed. In this case I used:
- name:name
- address:address
- nickname:nickname
On the left side it will be the variable name that will be saved on Firebase, it could be anything you want. The one on the right side after the “:” is the variable where I stored the data I’ve input.
//For real time changes.
    fireBaseusers.on("child_added", function(data) {
        var records = data.val();
        displayRecords(records.name,records.address,records.nickname);
    });
This part makes sure that Firebase will sync up on the frontend once a child has been added. There’s a parameter named “data” this is where Firebase stores what’s returned once there’s a child added. I stored the data returned in a variable named “records”. I call the function I’ve created named display records then pass the 3 parameters I needed which is records.name,records.address,records.nickname. The data returned is in the form of objects.
function displayRecords(name,address,nickname){
    $('#records').append('<tr>' + '<td>' + name + '</td>' + '<td>' + address + '</td>' + '<td>' + nickname + '</td>' +'</tr>');
}
This is the function I’ve mentioned earlier, it accepts 3 parameters. Then it appends data on the table I’ve created containing the returned name,address and nickname gathered on my firebase.