Boinx's Blog

Stepping stone

Creating a Ghost Custom Theme

To create your own custom theme for Ghost, navigate to your Ghost folder. Under content/themes create your theme folder.

Basic Structure of a Ghost theme

images

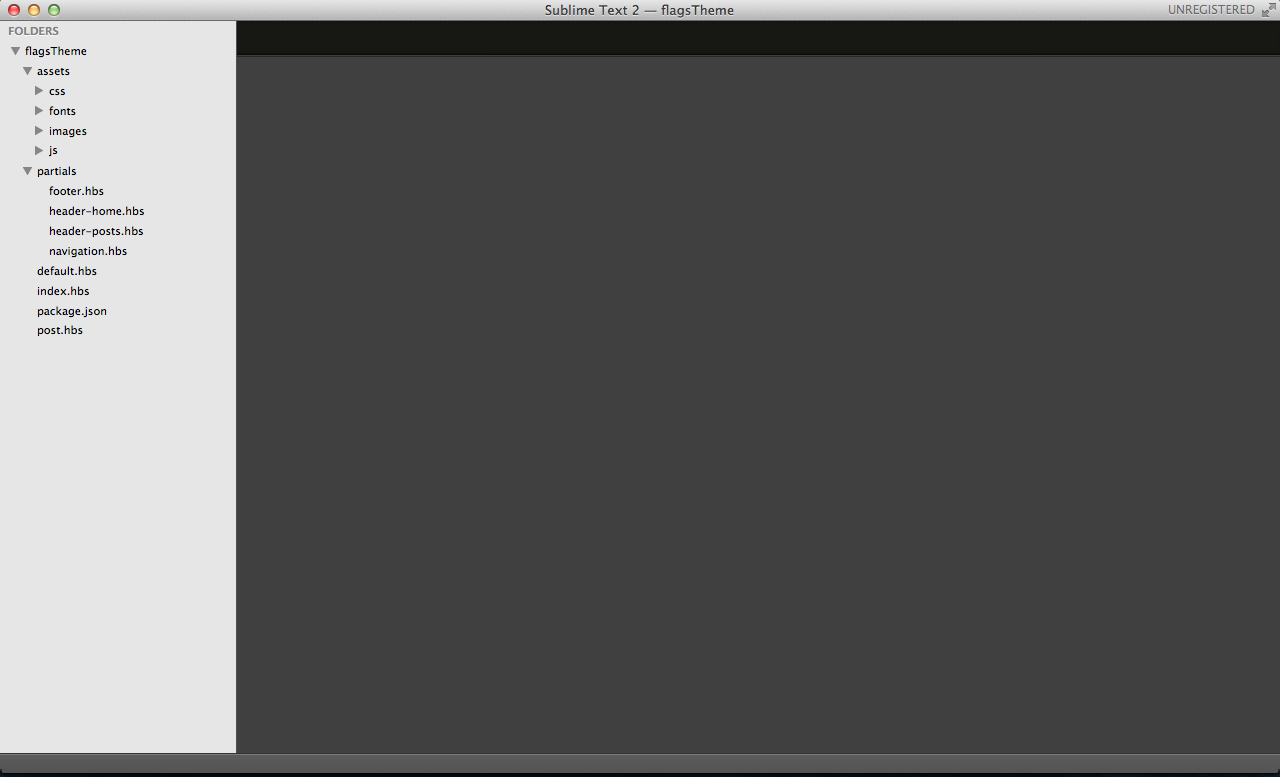
    1. Assets - this will contain all the resources you’ll be using for your site.
    2. Partials - contains different template files that can be included to your main template files. Examples are Header and Footer.

Required files for your custom theme:

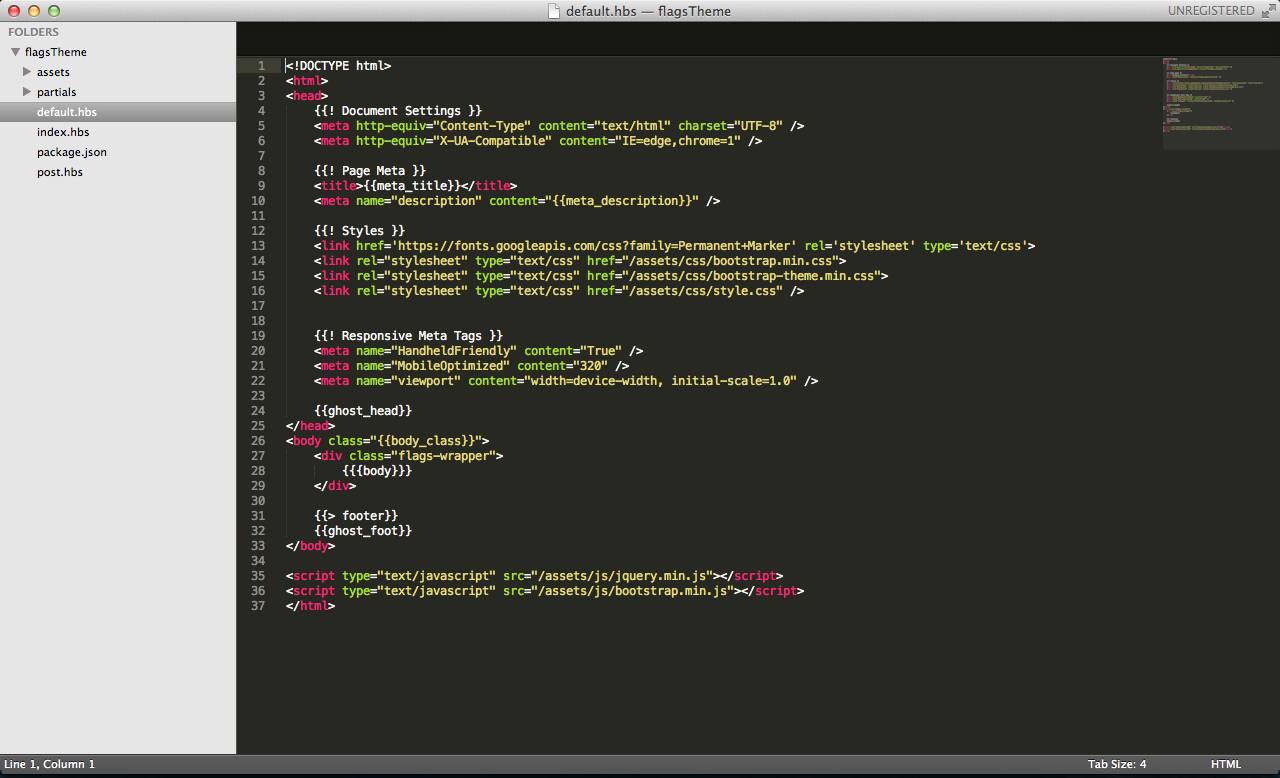
default.hbs

images

This template file contains the html tag, head tag and body tag. This is where you link up external scripts and stylesheets.

index.hbs

images

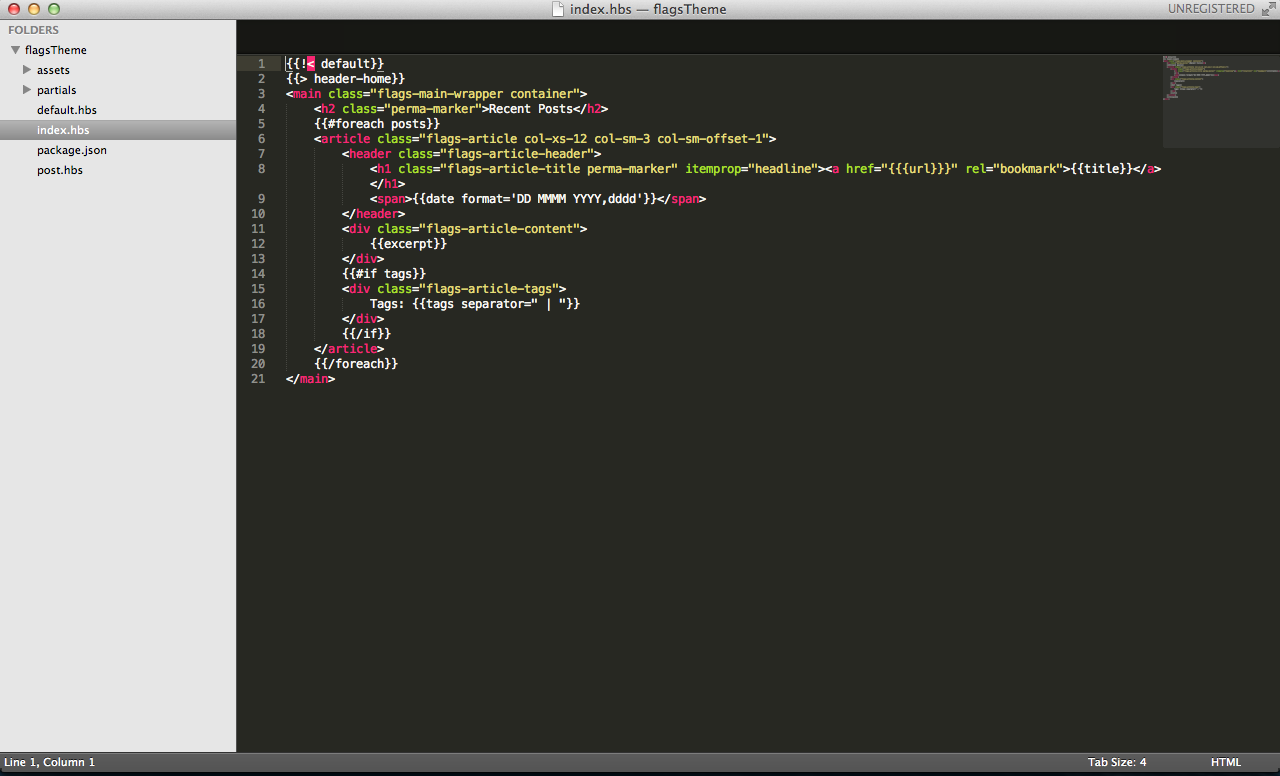
This is the template file for your homepage.

package.json

images

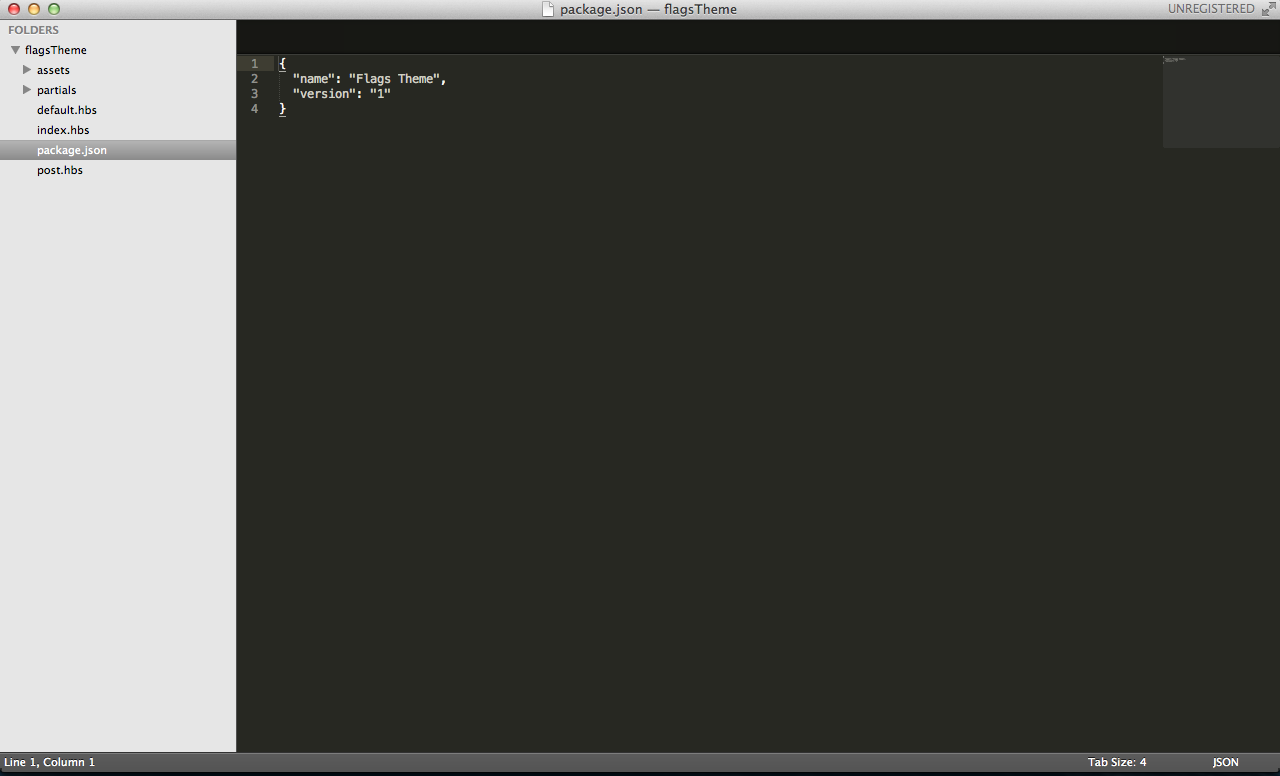
This is where you set the name and the version of your theme that will appear when selecting a theme in the admin dashboard.

posts.hbs

images

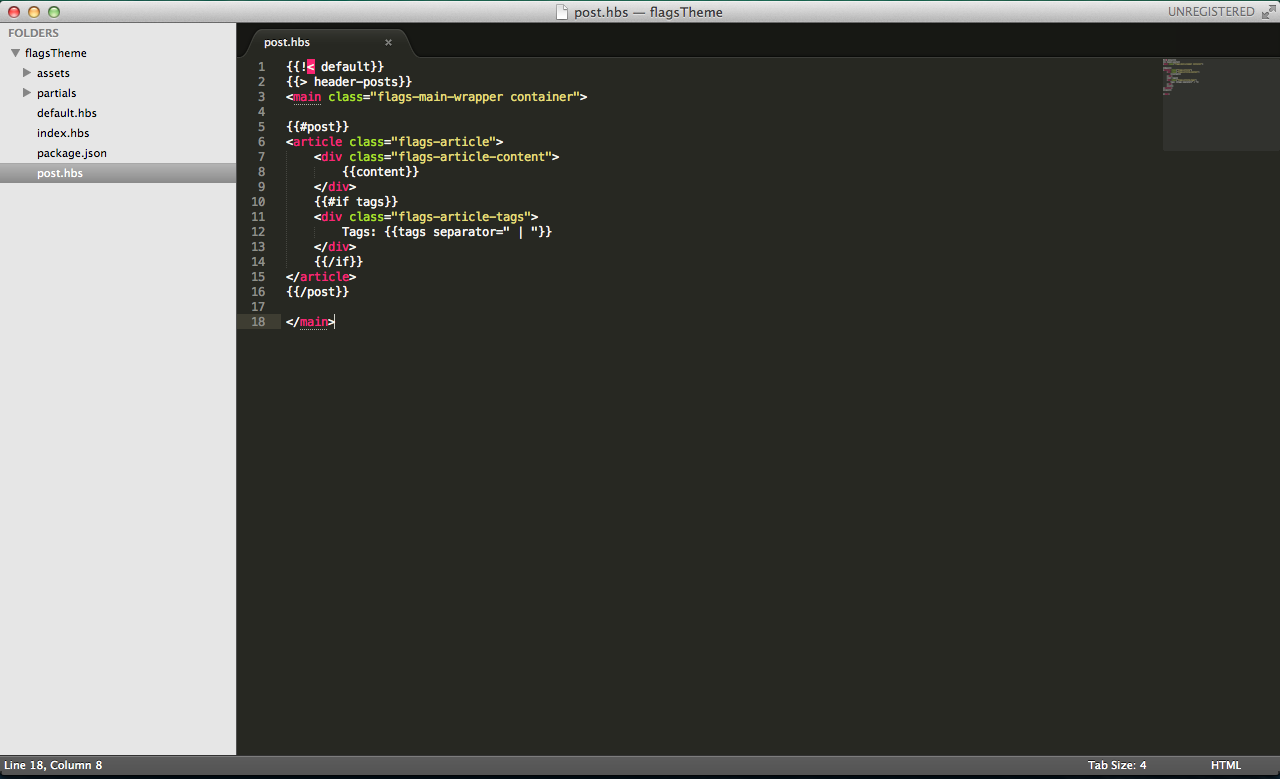
This is the template that will be used by all your posts.

My Basic Custom theme

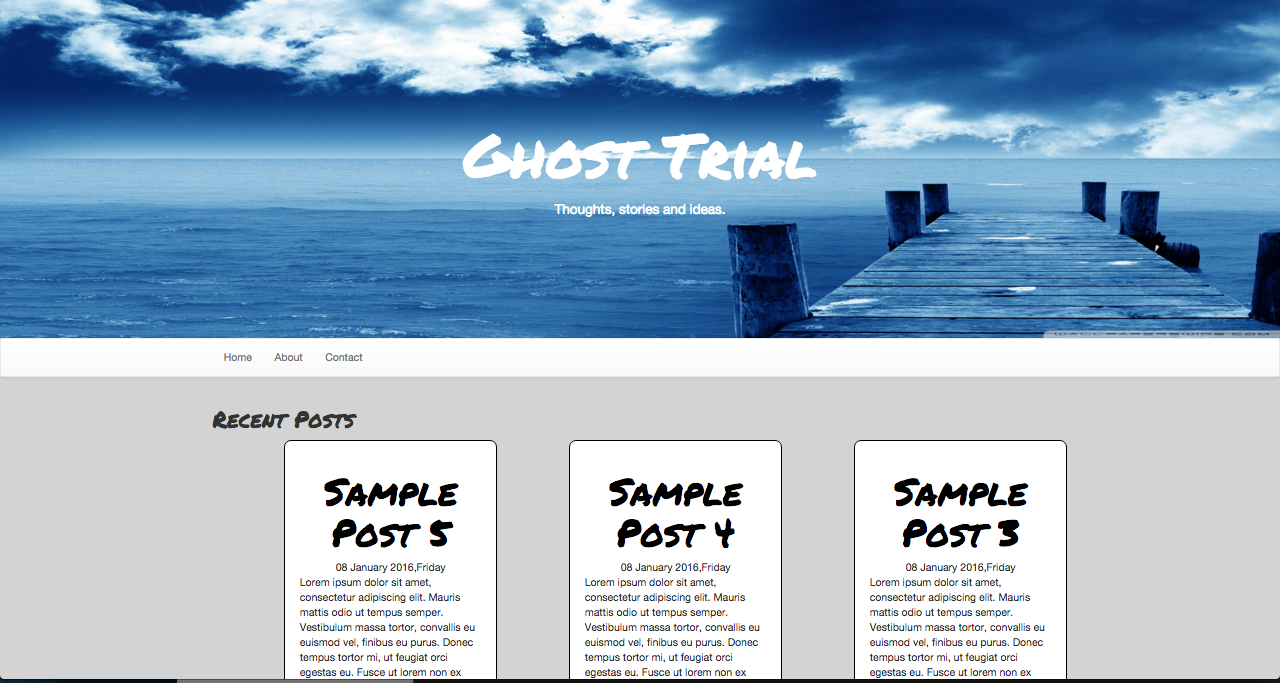
Homepage

images

Post

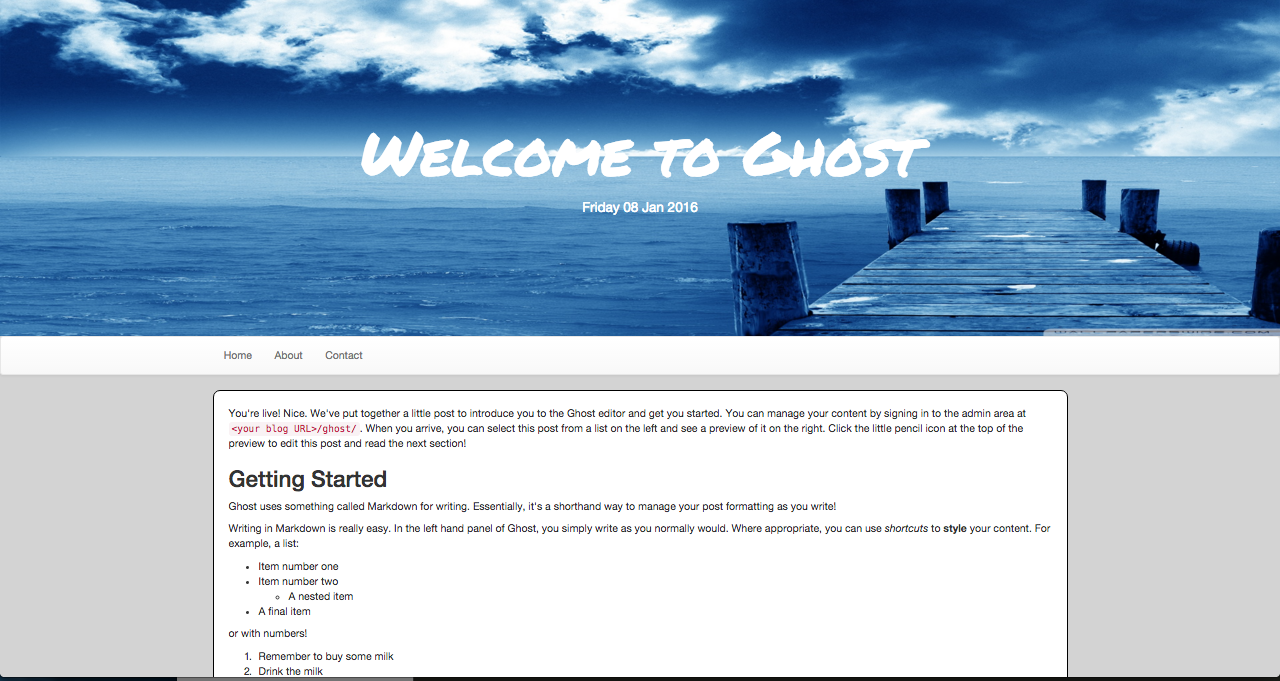
images

Here’s a link for an overview on how the Ghost theme works and showing what are the available handlebar expressions and helpers for your theme.

Ghost

Ghost is an open source blogging platform. What makes it different to other blogging/cms platforms is that it uses Node.js not PHP. It uses Handlebar.js for the templates. Ghost is limited only for content creation, there’s no other functionalities available. You can use it as your journal,blog,etc. You can add members by inviting them to your team and you can assign them different roles.

Pros

  • Open Source
  • Friendly UI
  • Fast response/loading time
  • Easy templating system
  • Lots of themes available

Cons

  • Just a “BLOGGING” platform.
  • No plugins available to add functionalities.

Setting up Ghost

*Make sure that you have Node.js installed on your Machine since Ghost requires it.

“Ghost needs Node version ~0.10.0 || ~0.12.0 || ~4.2.0”

  1. Download Ghost here.
  2. Navigate to the folder where you want to install Ghost and unzip it there.
  3. Open up your terminal and navigate to the folder where you unzipped Ghost.
  4. Type in “npm install –production”. This will install Ghost.
  5. After installing Ghost, type in “npm start”. This will run Node.js and your Ghost site is now accessible at “localhost:2368”.

Accessing Admin Panel

Go to “localhost:2368/ghost” to access the admin panel. You will be required to input the credentials for your account. When Ghost is newly installed, you will then be redirected to a form in where you’ll create your admin account and fill up some details about your site. After that, your site is ready.

Admin Dashboard

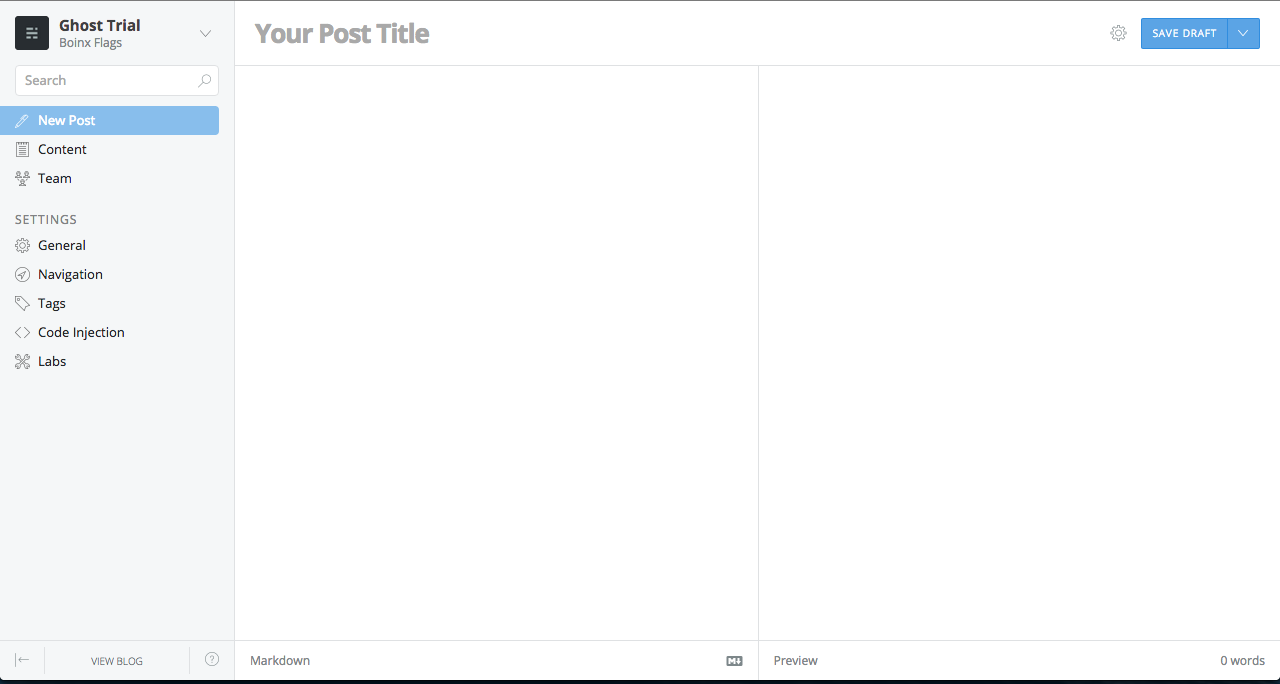
Creating New Post

images

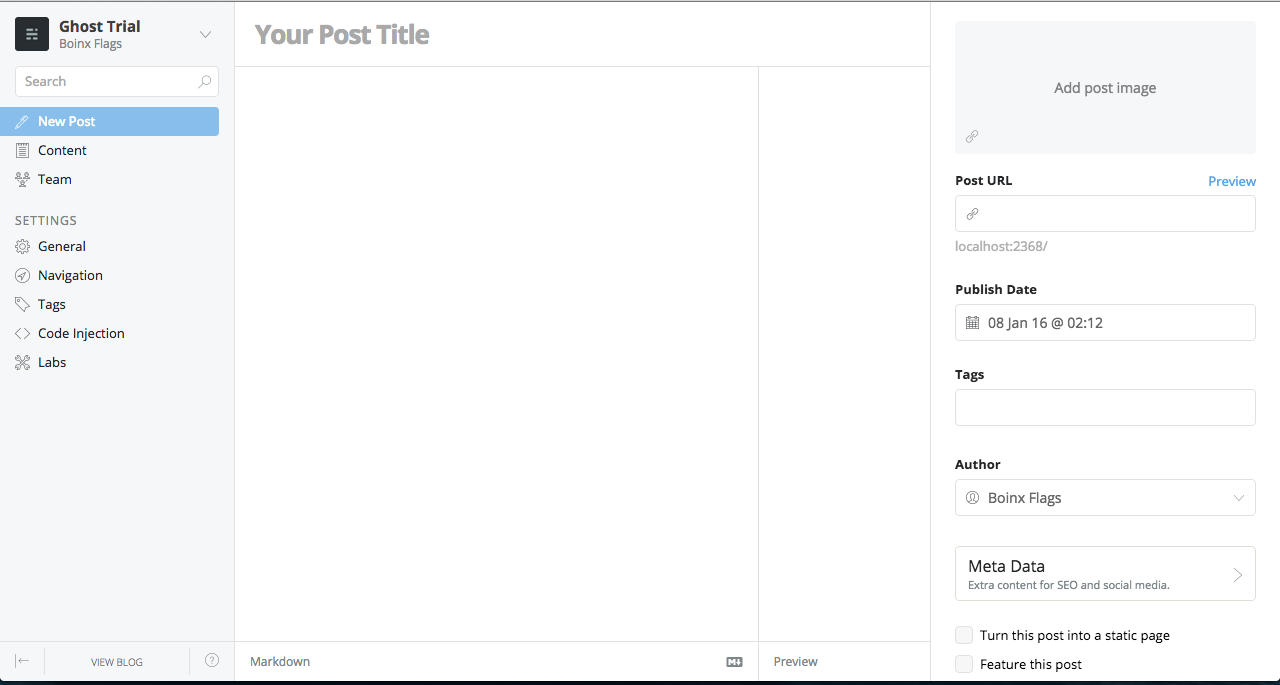
Post Options (You can go here by clicking the “Gear” icon beside the Save Draft button. Refer to the image above)

images

In here you can:

  • Upload a Photo for the post.
  • Customize the url of the post. By default, the title becomes the url.
  • Set the Publish Date.
  • Add tags.
  • Assign Author.
  • Add Meta for SEO.
  • Make the post a static page.
  • Make the post featured.

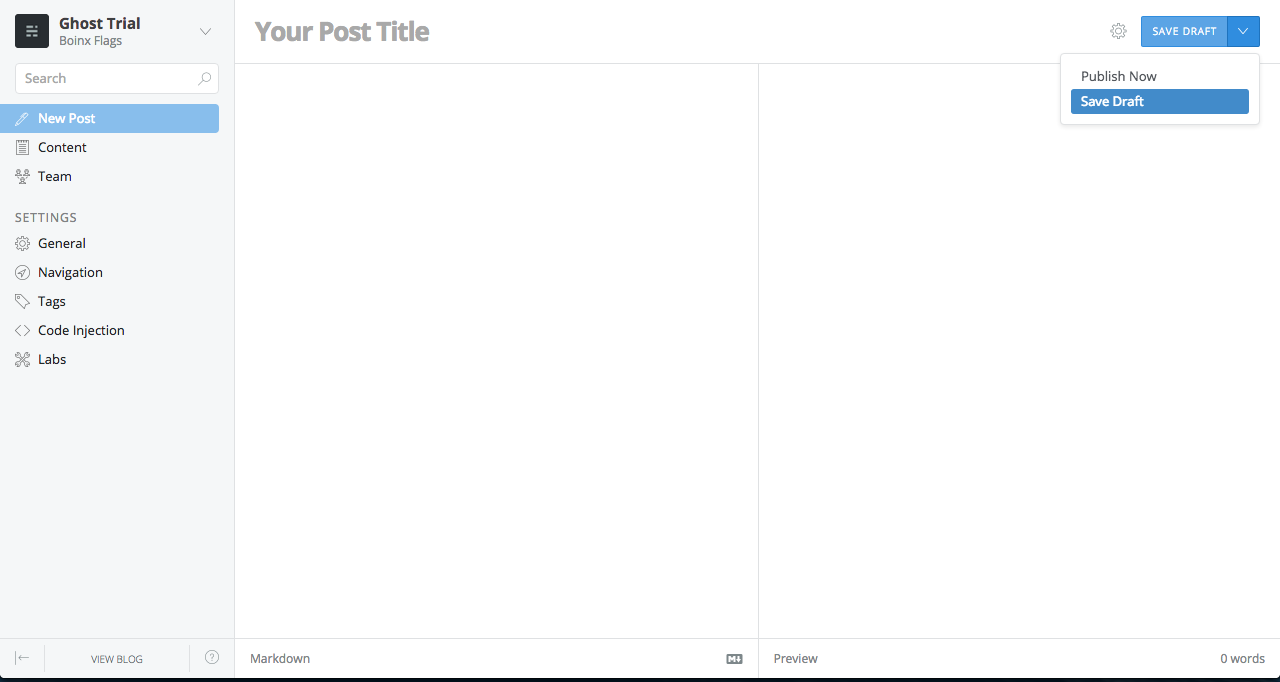
Publishing Post

images

You can Save it as a Draft or Publish it right away.

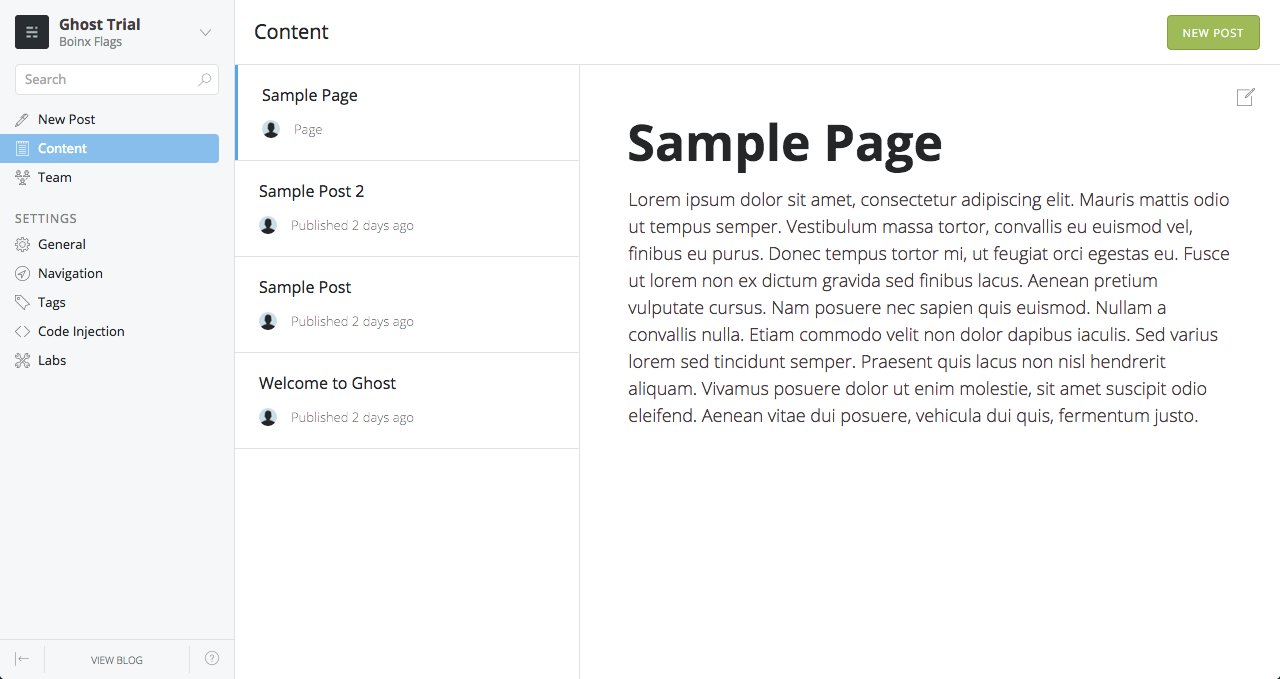
Contents

images

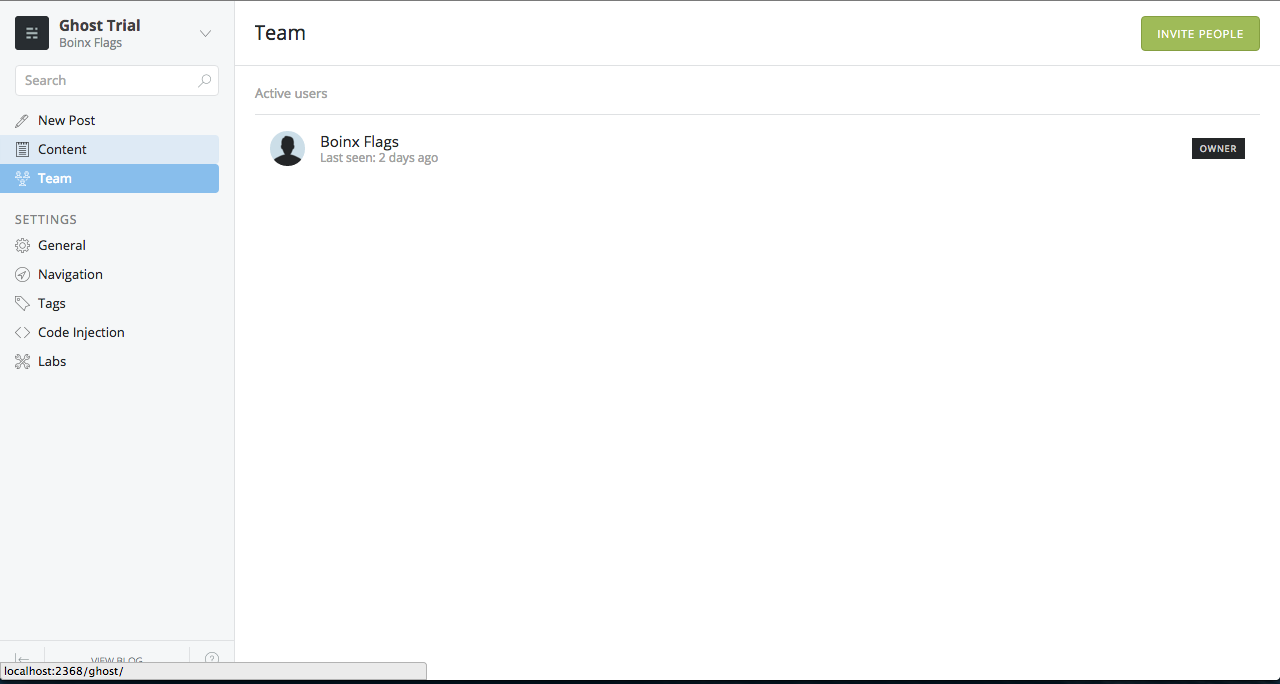
Team

images

Here you can invite people to become a team member. You can assign different roles to them.

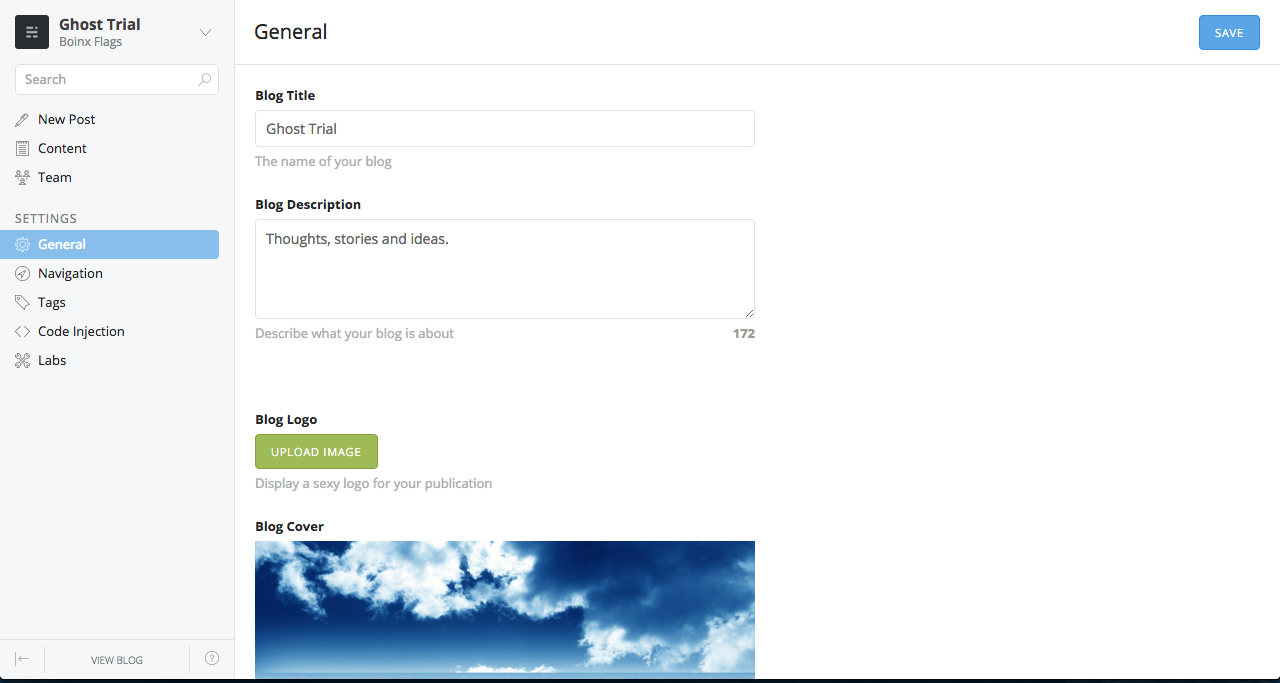
General Settings

images images

Here you can manage the following:

  • Blog Title
  • Blog Description
  • Blog Logo
  • Blog Image Cover
  • Posts per page
  • Date in your permalinks
  • Themes
  • Making the Blog private.

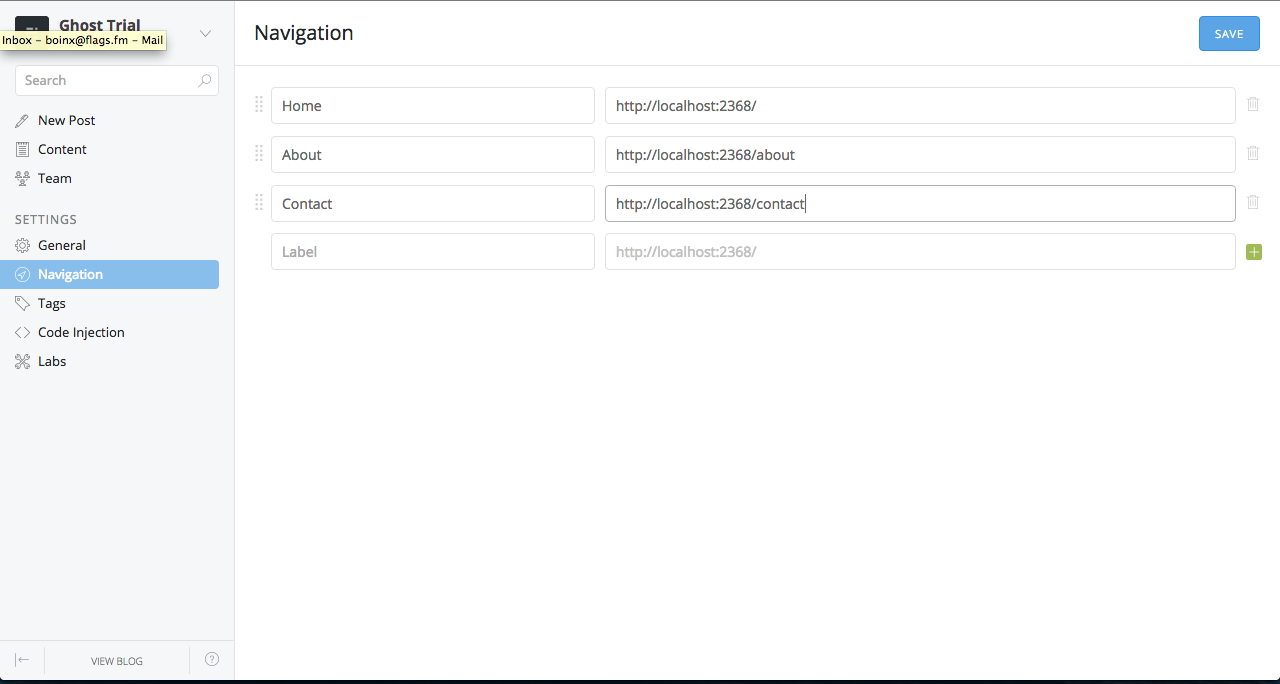
Navigation

images

Here’s where you manage the navigation menu of your site.

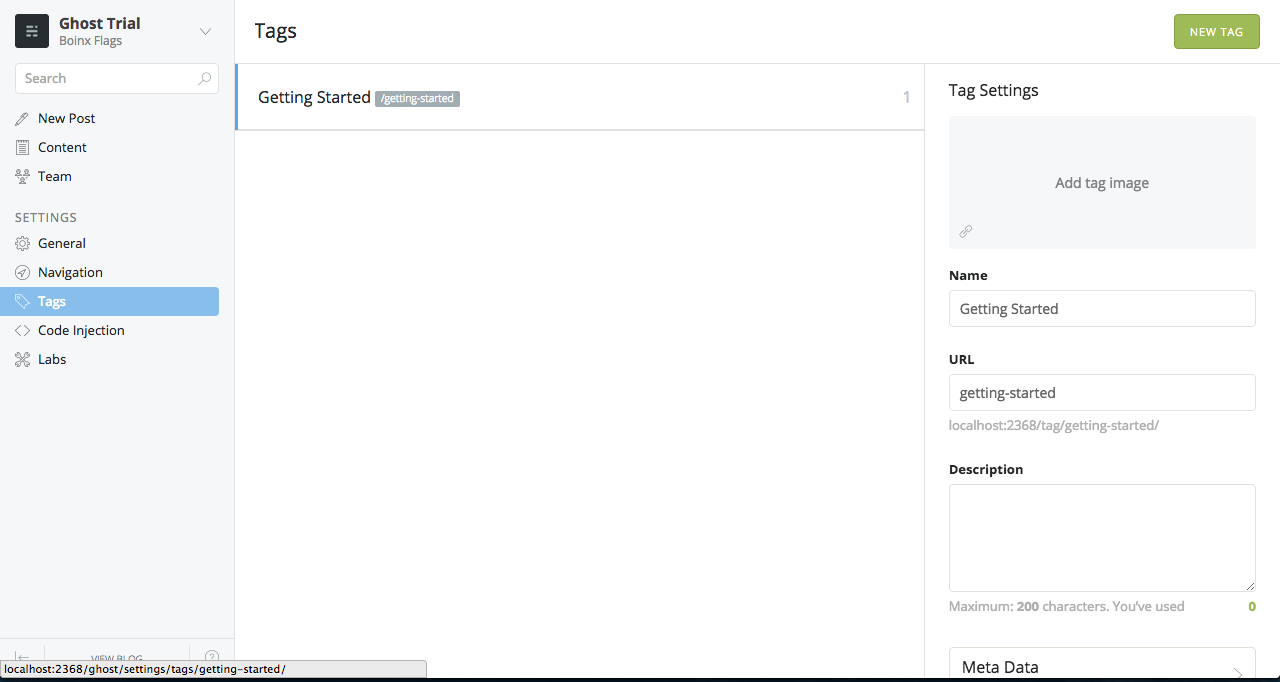
Tags

images

This is the place where you can manage your tags.

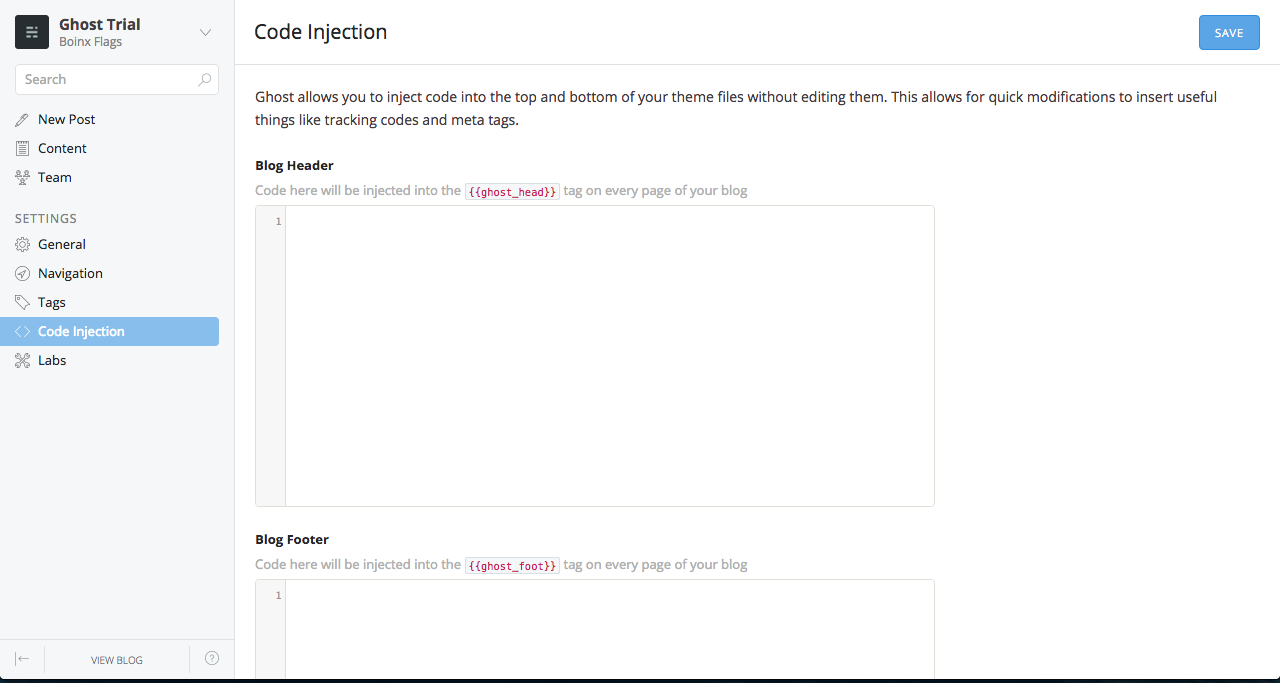
Code Injections

images

You can inject codes to your sites header and footer by using this. Best used if you need to add Google Analytics or any scripts that needed to be injected to your site.

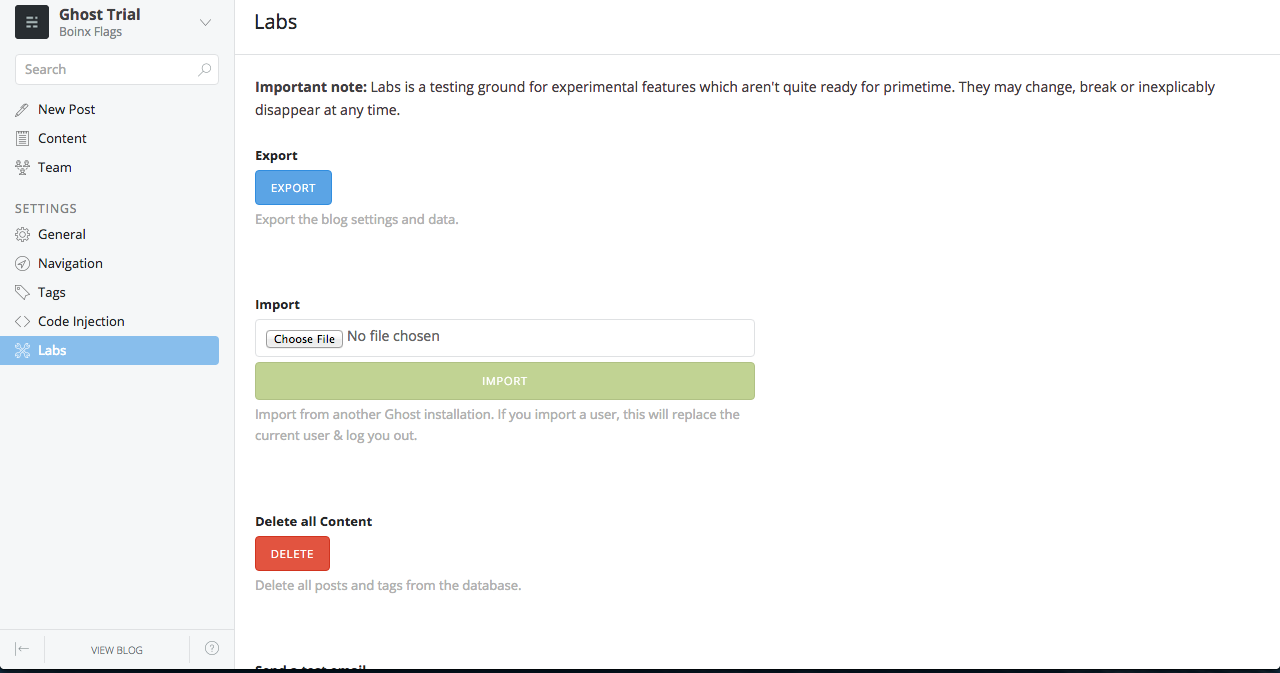
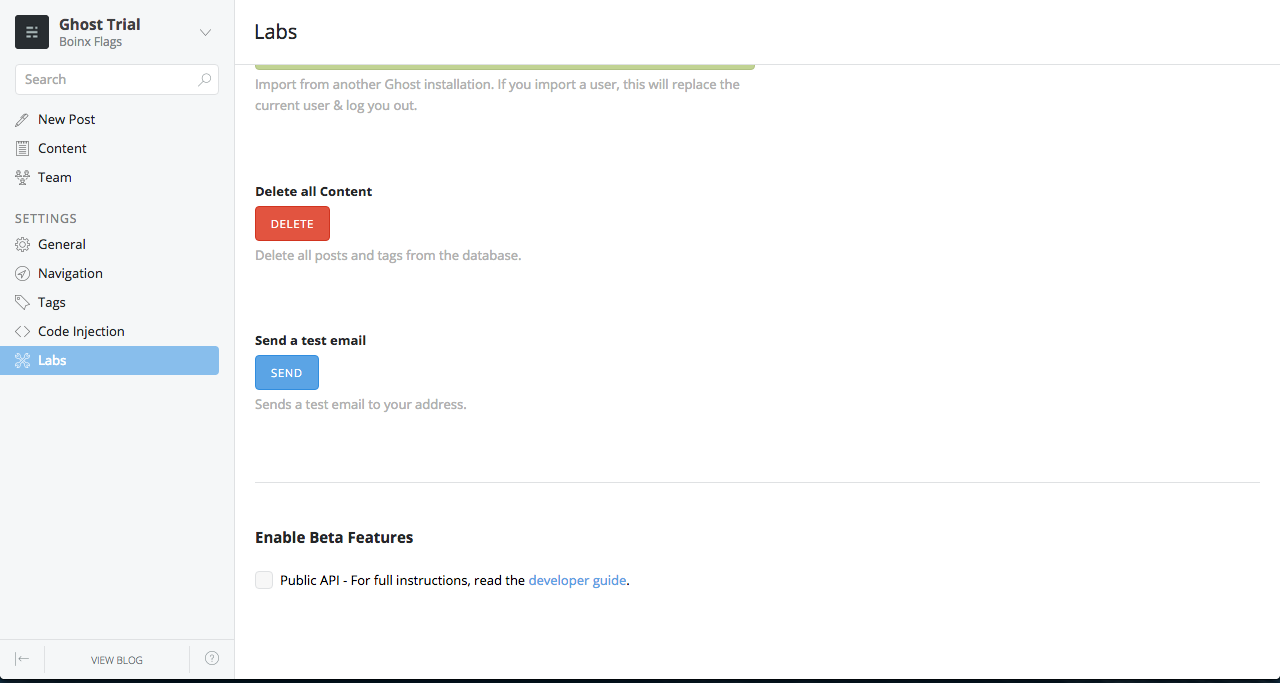
Labs

images images

Different experimental features for Ghost.

So that’s all for the introduction of Ghost. Here’s a handy Ghost user guide for you!

Slick Slider

Slick by Kenwheeler is a powerful plugin for creating responsive slider/carousel with different functions. jQuery is required for this plugin to work.I’m gonna put some demos of commonly used features on sliders/carousels.

Demos

  • Single Item
  • Autoplay
  • Multiple Items
  • Lazy Loading
  • Fade
  • Adaptive Height
  • Responsive Display

You can download the resources to be able to use this plugin here and for further explanation on how to use this plugin click here.

Ruby pt.1

So I recently took up Ruby course in Code Academy and I’ll share some of the basic codes of Ruby that I’ve already taken up on Code Academy.

Declaring Variables for different Data Types

my_Name = "Boinx" #String
my_Decision = True #Boolean
my_age = 21 #Integer

Puts and Print

 puts "Hi"
 puts "Hello!"
 print "Boinx"
 print "Bantug"

 #Output
 Hi
 Hello!
 BoinxBantug

When you use “puts”, it’ll automatically print the next item you’ll print on the next line unlike “print” which prints the next item on the same line.

Methods

"Boinx".length  #Will return the length of the string "Boinx"
"Hello".reverse #Will return the reverse of the string "Hello" which is "olleH"
"BOINX".downcase #Will make all the letters in lowercase.
"boinx".upcase #Will make all the letters in uppercase.
"boinx".capitalize #Will make the first letter in uppercase.

Commenting

#using "#" in comment will allow you to put a comment on one line or single line comments

=begin
 And this is how to make a multi line comment.
 Start it with "=begin"
 and close it with "=end"
=end

Getting inputs from users

first_name = gets
last_name = gets.chomp

=begin
"gets" is the method for getting user inputs. I used a variable here to store the users' input, the .chomp method is used
to eliminate the extra blank line produced by Ruby when getting users' input.
=end

Printing variables

first_name = "Boinx"

print #{first_name}

Firebase Test

So I’ve made a simple site which uses Firebase for data storage. It is a powerful platform because it allows you to save data and at the same time output the data realtime on the site. You can also host your site using the Firebase hosting service. It also offers User Authentication service which enables user to login via email or most of the social media society uses nowadays. You can use firebase for free or you can also apply for a plan which gives you larger storage, more connections, custom domains and etc. You can sign up here.

In this example I only used Javascript in integrating Firebase on the site. For me this is the simplest way you can set up Firebase to your site. If you’re only making a small web app using only JS will be sufficient and less more complex.

Registering and creating your first Firebase app

images

To start, you must register an account first and create your first Firebase app on your Firebase dashboard. Click “Manage App” button to access the firebase app you’ve just created.

Managing your app

images

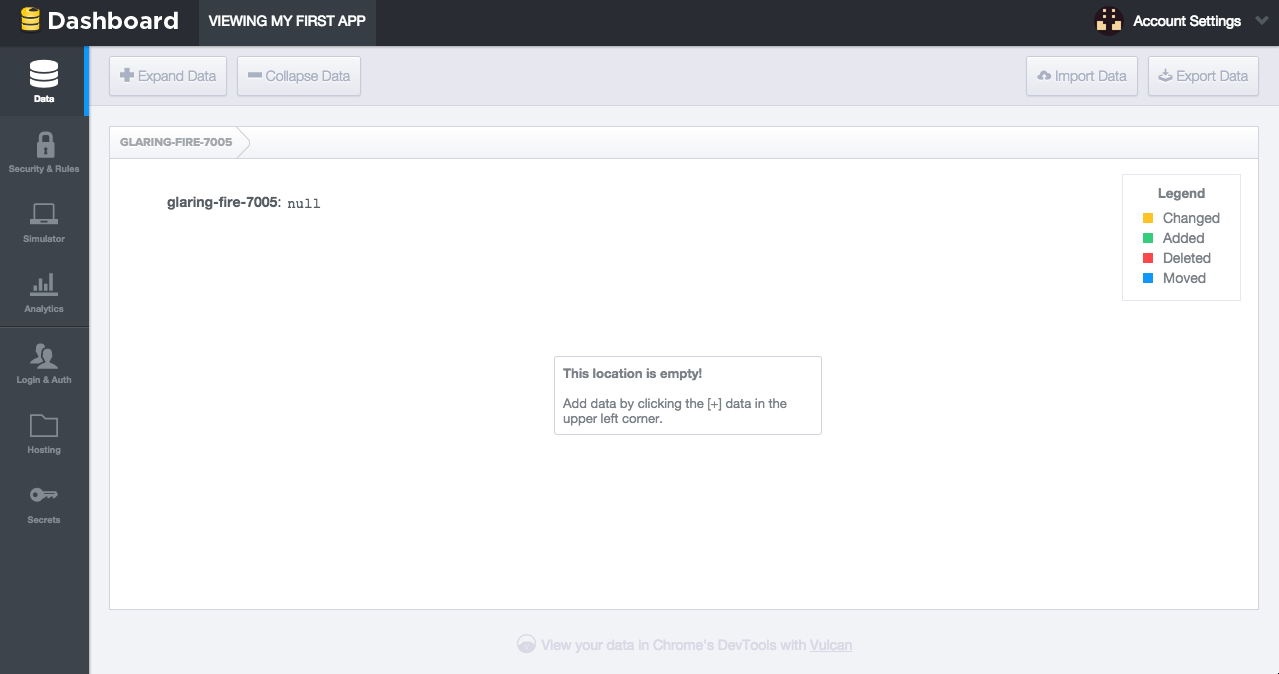
Once you’ve clicked the “Manage App” button, you will be redirected on a new dashboard. As you can see on the left side there’s a menu bar, Data, Security and Rules, Simulator, Analytics, Login & Auth, Hosting and Secrets. I’m gonna explain each briefly.

  • Data - this is where you will see the stored data. You can import data using JSON format and you can also export existing data from your firebase and it will generate a JSON file. You can also add and delete data to the firebase via this dashboard.

  • Security and Rules - you can set rules here for the users. The default rules implemented are the read and write set to true so that users can read and write data on the firebase app we made.

  • Simulator - you can try the authentication and read & write functionality of your firebase app. This is a useful feature when you’re setting up the login & authentication rules and rules of the firebase app you made.

  • Analytics - you can see here the total data stored, bandwidth for the last 24 hours and last 30 day and concurrent users. Updates ever 15-20 mins.

  • Login & Auth - you can set up the login & authentication of your site here. You can set login via email, facebook, twitter, google +, github or you can create your custom authentication.

  • Hosting - by default when you’re site is still not hosted via firebase this contains steps on setting up and deploying your site. Once deployed, this will be the directory for your static files(HTML,CSS,JS,etc.)

  • Secrets - used to generate tokens when crreating a custom authentication for your site. This will store all the tokens made.

Mandrill

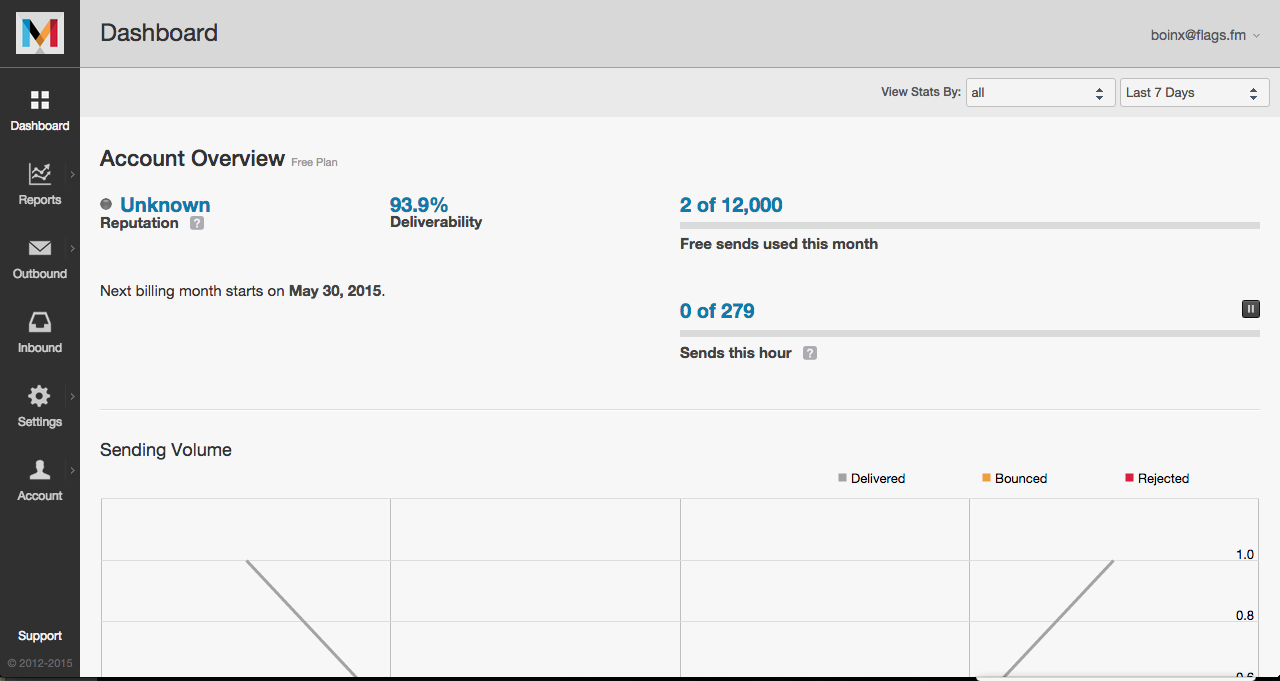
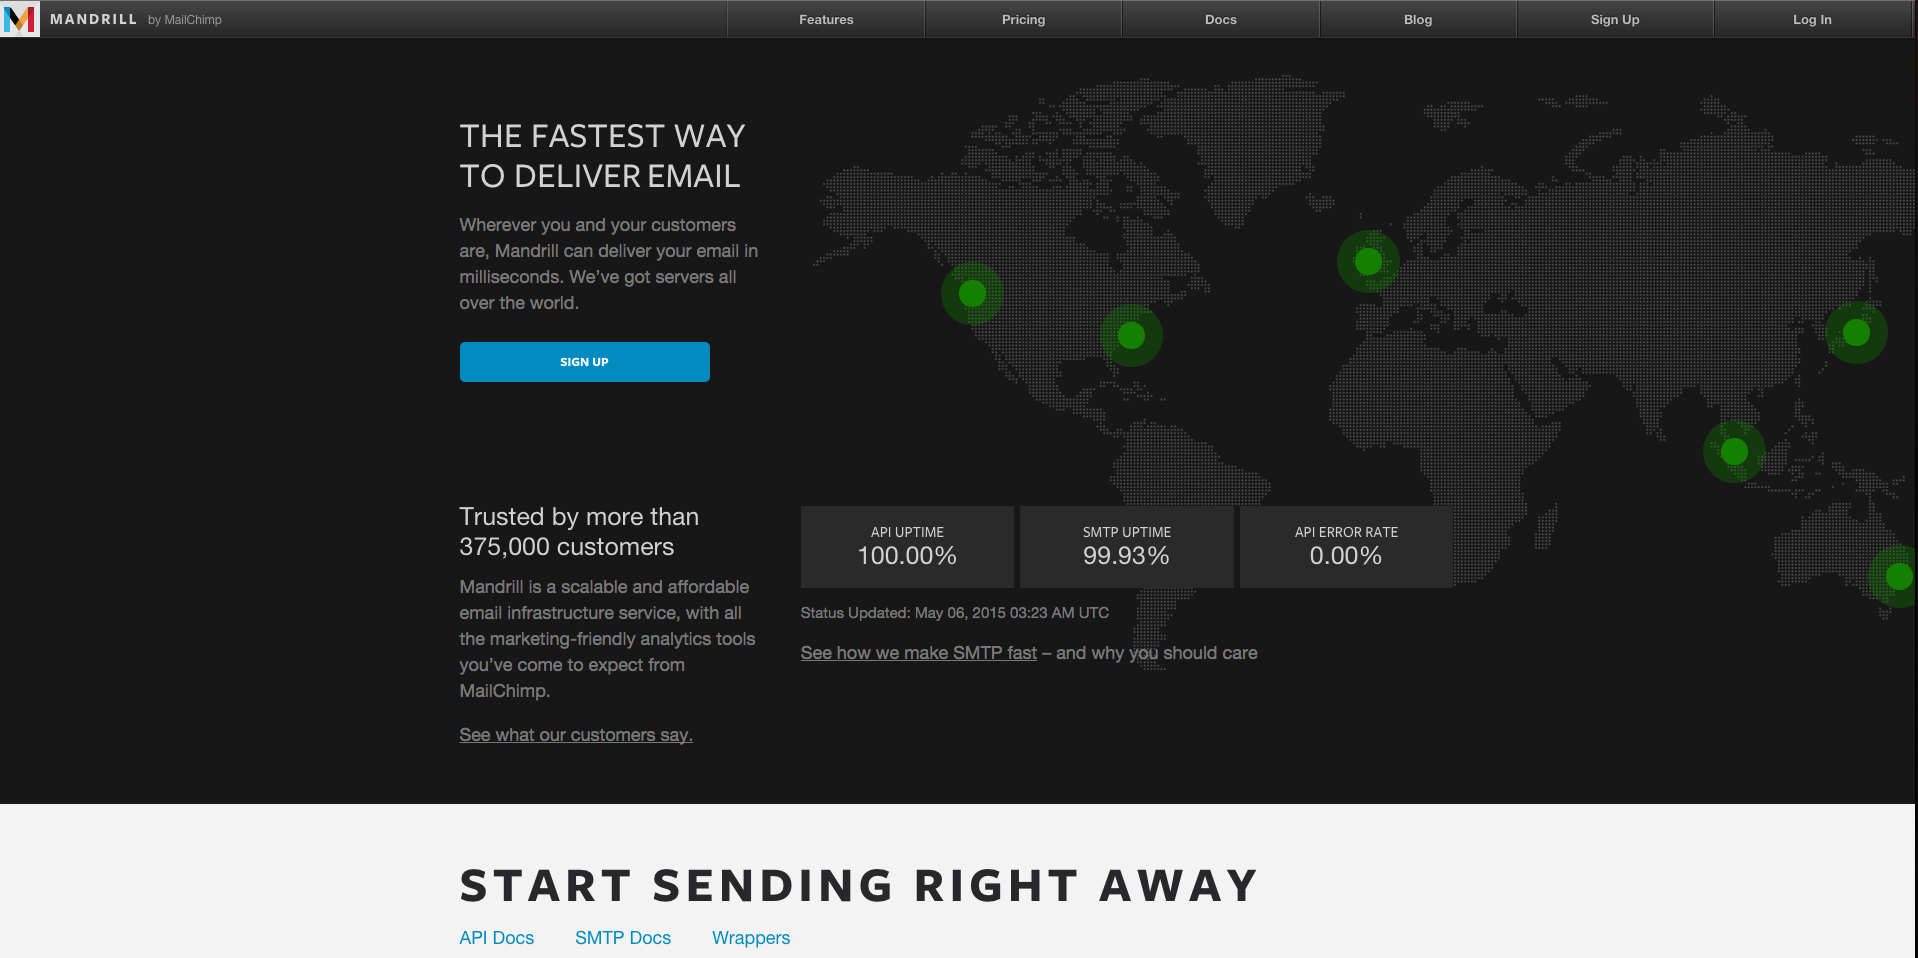
Mandrill is an email service offered by MailChimp. It allows sending bulk emails and you can manage the flow of email sent via the Mandrill Dashboard.

Mandrill Home Page
images

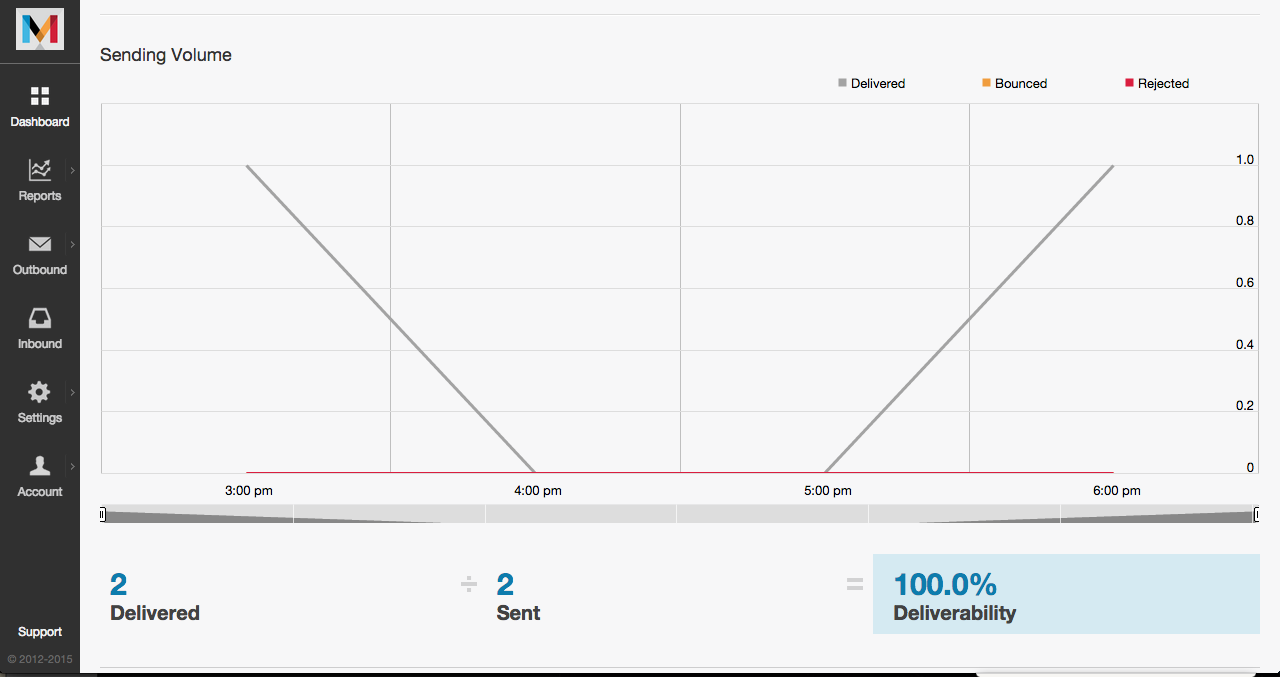
Mandrill Dashboard

images images

So i’ve used this on a project that requires sending bulk emails to users who registered to the site, at first I’ve used the SMTP way but the problem is that sometimes when it reaches the daily quota of sending emails it will not send emails at all for the next 24 hours.

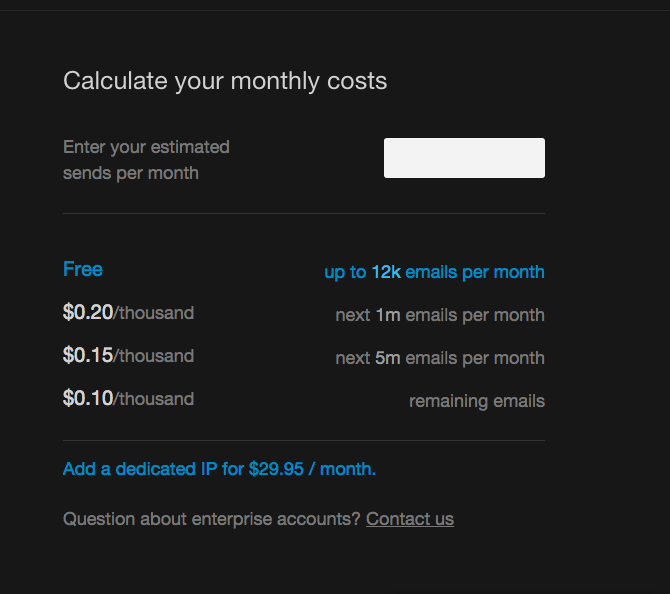
Mandrill Rates
images

I’ve registered for a free account so the monthly quota is 12k emails/month which is a decent amount of email but if you want more you can get a premium account and the rates are stated above.

Drupal Mandrill Module

I’ve used this on a Drupal site and there’s a drupal module that’s currently available for use. Here’s the link for it.(Current stable version is for Drupal 7)

Requirements for this module to work:

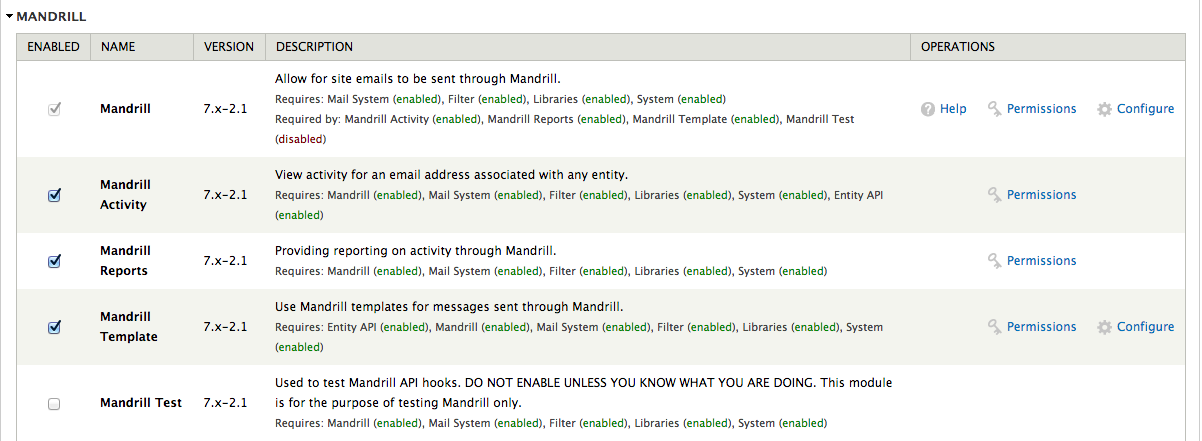
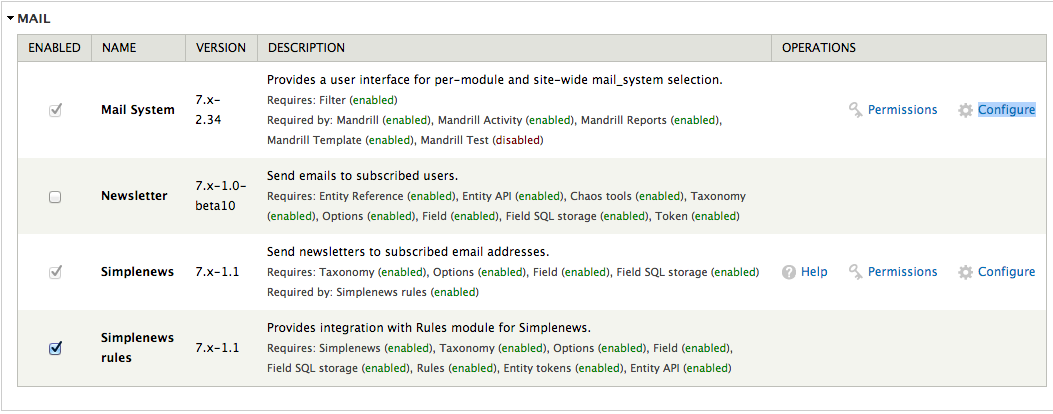
Once you’ve follow the step on installing and enabling the module,you can now configure your mandrill app by going to modules and finding Mandrill then click on ‘Configure’.
images

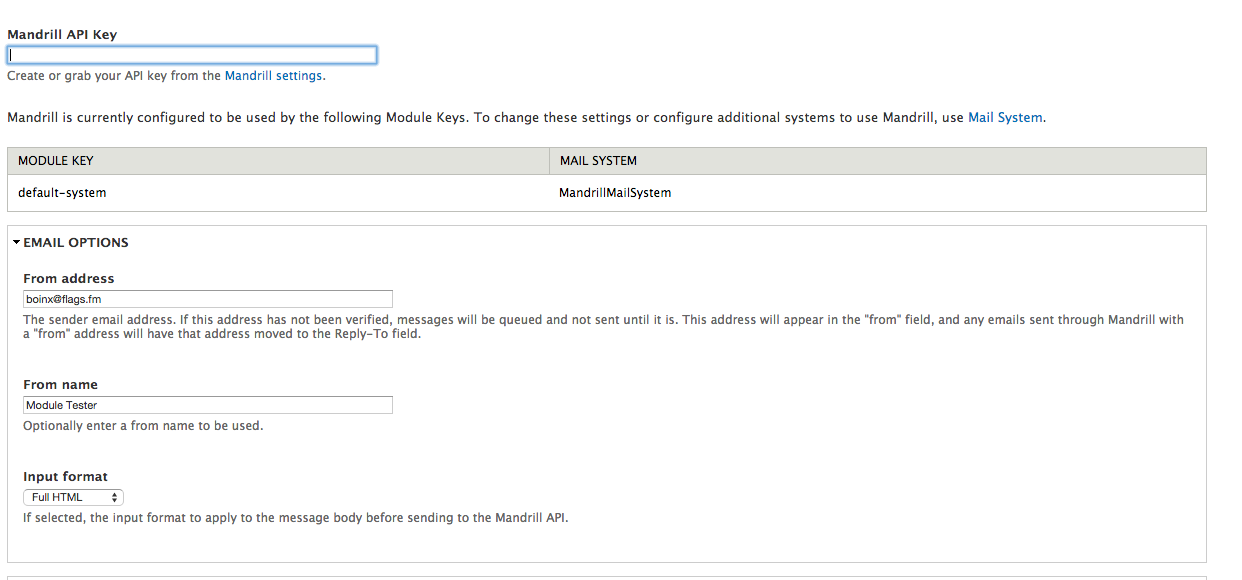
You’ll be redirected on the Mandrill page of your drupal site and it will now ask for an API Key.
images

To get an API key, register an account on Mandrill.Once registered, login and click on ‘Settings’. You will find there the ‘Create API Key’ button. Click that to create a new API key, you can fill up the Description and check the checkboxes based on how you’ll use it but you can leave it all blank and unchecked.

images images

Once you get the API key you can now paste it on the API key field on your Mandrill app page on your drupal site and continue configuring it.

  • From address - will be the email address used to send the emails. You can use any email address.
  • From name - you can optionally put here a name to be used as the sender of the email.
  • Input format - you can choose the format of your email. (Filtered HTML, Full HTML and Plain text)

images

images

images

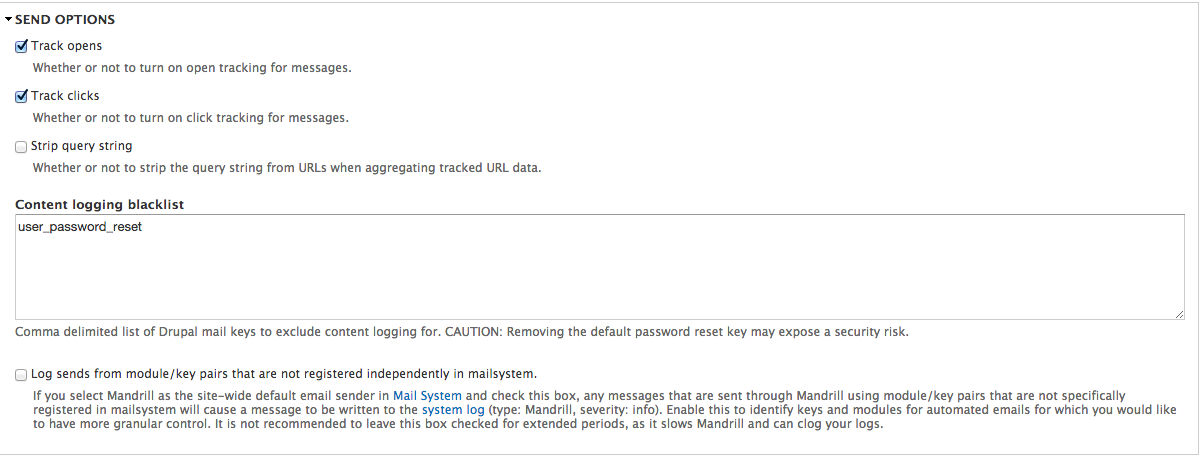
Once you’ve set up everything, you can test out if your Mandrill can now send emails. You can click on the ‘Send Email’ tab on the tabs above.

images

Fill in the email address you want to receive an test email and you can edit the contents. Include attachment checkbox will Include a drupal icon attachment to the email when checked.

images

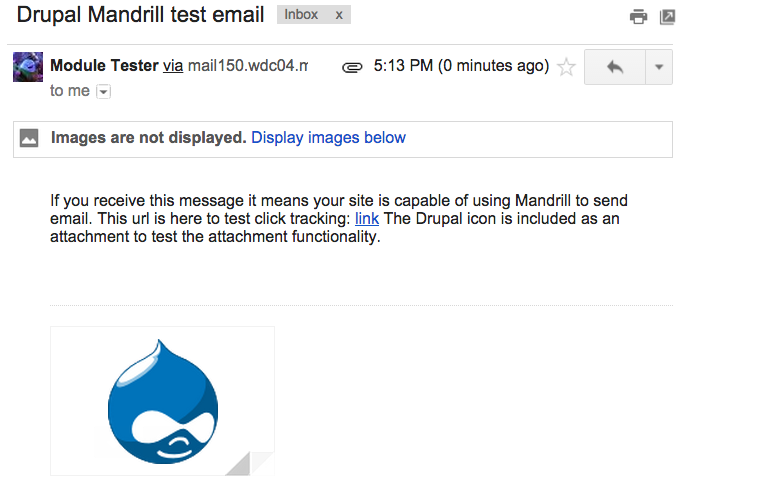
This is what the sent email looks like:
images

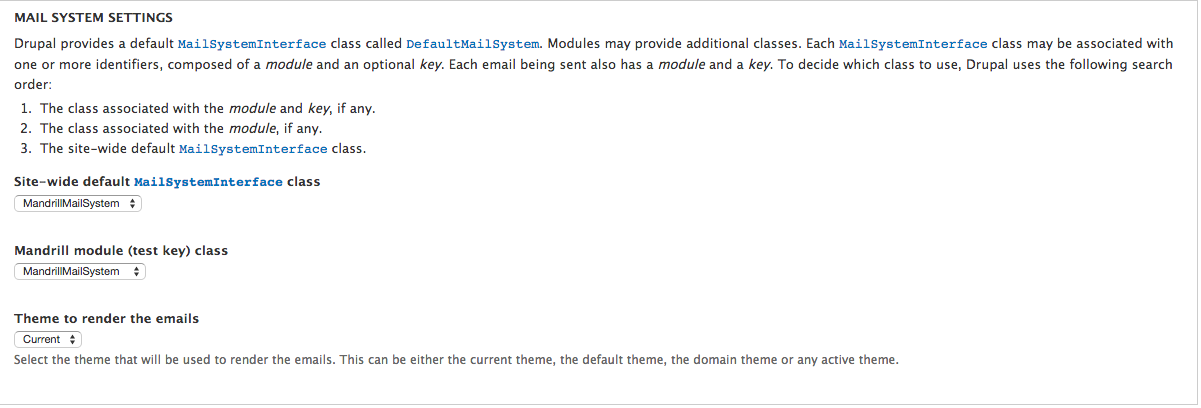
One last step is to set all the email functions to use the Mandrill App, go to Modules again and find ‘Mail System’ then click ‘Configure’.
images

images

You just have to make sure that the ‘Site-wide default MailsystemInterface class’ is set to MandrillMailSystem and you’re all good. All the outbound emails will now be sent through Mandrill. Congratulations! You’ve set up your Mandrill App on your Drupal site.

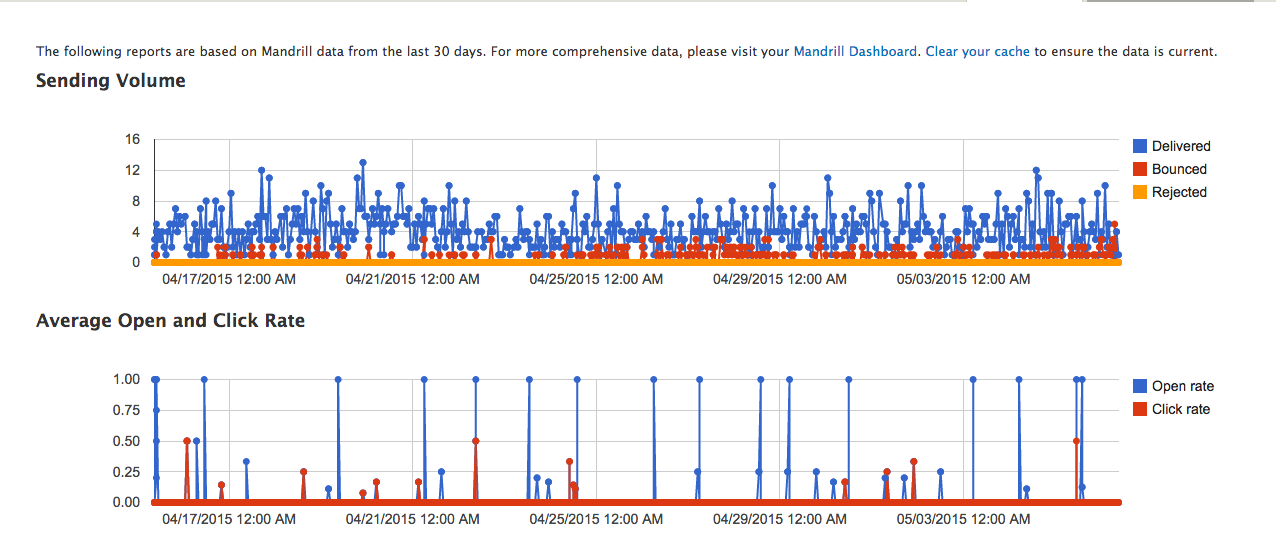
You can keep track of your Mandrill App via the Mandrill Dashboard on your Drupal site. Go to reports > Mandrill.
images images

Drupal Modules

I’m gonna share some useful Drupal modules that you may find useful on some projects.

  • Protected Node - allows you to have password protection for different kind of nodes. A user can only access the node if he/she has the password but the author can access it without using a password.
  • Content Approval- most likely to be used on forums and some file sharing sites. This allows the moderators or admin to approve first the shared file or content by a user. It saves the node but it doesn’t publish it to the site.
  • Views- this is a useful tool to control the contents of your website. This allows you to put different contents on a block and assign it to a region.
  • Views Field view- This allows you to embed a view as field on other views. So this allows you to put a view/s inside a view.
  • Save Draft- adds a “Save as Draft” button for the CMS of all content types. This feature is not present on Drupal interface yet so it’s a great module to use.
  • Advanced Form Block - this allows you to expose an “Add” or “Edit” block for different content types. You can use this if you want your user to add contents without using the admin panel.
  • Node Lazyloader- This makes all the nodes present on the page to lazyload so that your site can load faster.
  • Rate- This module allows you to have a rating widget on different content types. It can be Thumbs Up, Thumbs up/down, fivestar, emotions and etc. This is useful if you want the user to rate the contents of your site.

That’s it for now. Will update this blog once again when I find something useful. Thanks!

Chrome Extension

Last monday, Sir Efren asked us to try and create a simple Google Chrome extension. I was assigned to do the Stock Quote Extension. I will show you how I built my own Extension.


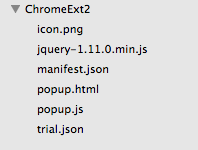
This is the project directory of my extension:

images


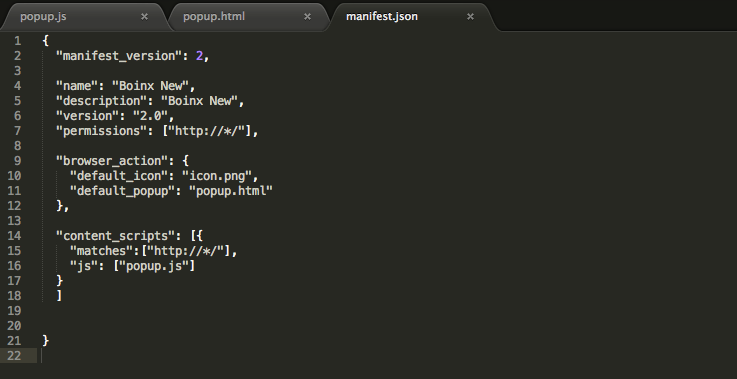
First:Created my manifest.json file.

images

Your manifest file contains the details about your extension.

  • Manifest Version - declares what version your manifest should be. It’s currently should be set to 2 because 1 is already deprecated and the support for it is already phased out.

  • Name - this will be the name of your extension. This is what will the users see when they download or use when they search your extension.

  • Description - description for your extension. This is to explain to the users what your extension do.

  • Permissions - usually used to connect APIs to your extension. It is to permit the connection of your extension to the external API.

  • Browser Action - this is where you put what behavior will your extension do when clicked.

    • Default icon - this will be the icon of your extension.

    • Default popup - once the icon of your extension was clicked this will show up.

  • Content Scripts - this is where you declare external scripts, external css, etc.

    • Matches - this specifies the pages where your script will be injected.

    • scripts - this is where you specify the external script files that will be used. So that the extensions will run your script once it was clicked. Inline scripts are not accepted by the extension. You still have to include your scripts in the head tag of your html file.


Second:Created my html file

images

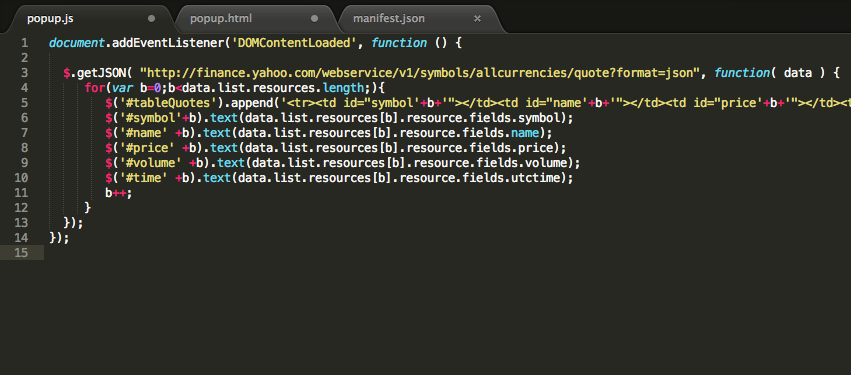
Third:Created my js file

images

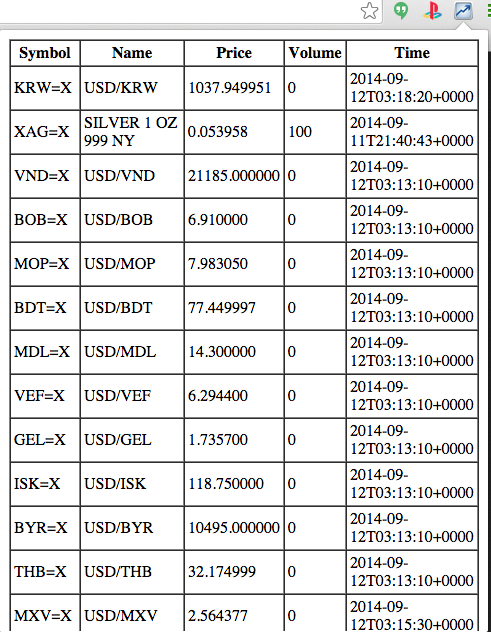
I created my own js file so that I can gather data from Yahoo’s Stocks API then it will be printed to the table on the extension’s popup.


My extension when installed

images

My extension is the one next to the PS Logo.


My extension when clicked

images

Everytime the user clicks my extension it will return updated results from Yahoo’s Stocks API.

PHP: Hypertext Processor

I recently broadened my knowledge about PHP. I took the course PHP at codeacademy and I’m here to share some of the things I’ve learned.

PHP codes should be under this tag:

<?php
    you input your PHP code here....
?>

Declaring Variables

$num1 = 1;
$num2 = 2;
$num3 = 3;
$true = true;
$name = "Boinx";

In declaring variables, we must not forget the ‘$’ or else our variable will be invalid and we’ll receive an error message.

Using the variables we’ve declared

echo $num1;
echo $num2;
echo $num3;
echo $name;

In calling the variables we’ve declared we should not also forget the ‘$’.

Bootstrap

Bootstrap is FUN! It is a great front-end framework that enables your site to be responsive. It means that whatever gadget you use in accessing your site it will automatically adjust to the dimension of the screen of your gadget so it is more presentable unlike loading the same web version of your site. It offers you pre-made buttons, forms, dropdowns, slider/carousel, anything that you will need in designing your website. You can use it for free, you just need to download it and include it on your html file.

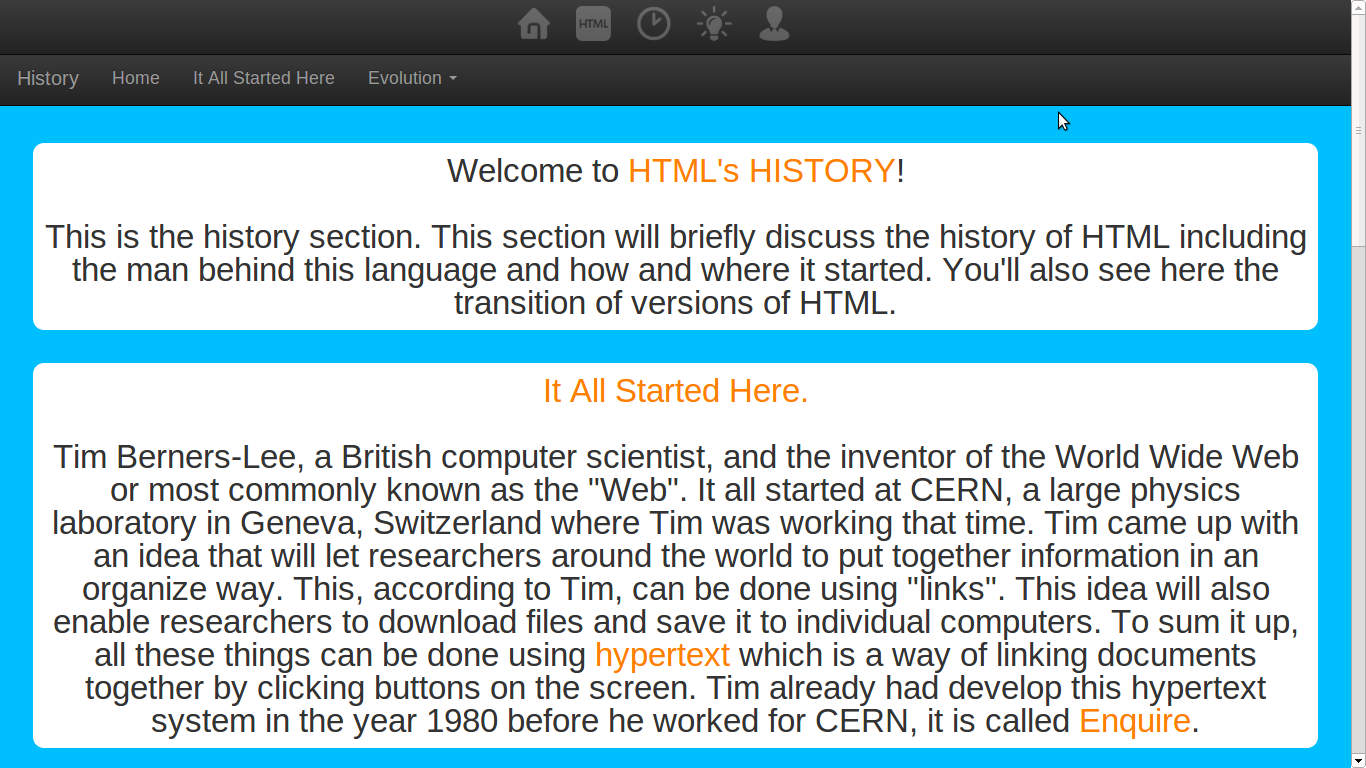
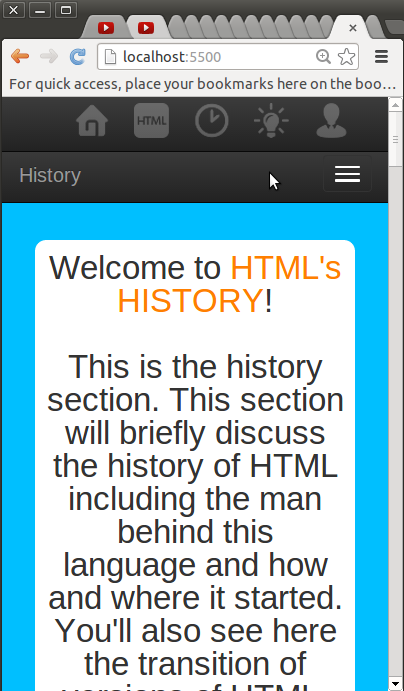
Here is an example of a site that’s made with Bootstrap

Web Version:

images

Mobile Version:

images

On the example above you can see that the site is responsive. Because of Bootstrap we didn’t have to create another project so that our site will be mobile ready. We’ve just used the same code from our web version and added Bootstrap then BOOM, it’s done.